Working With WordPress
How to Build Your Website in WordPress
Now that WordPress is installed and settings are configured, you can begin building your site! The first step is to choose a “Theme”. Themes are the WordPress word for “templates”. There is a large library of free themes that you can browse and choose from. And many of them you have to pay for. And many are free to an extent, but beyond that, they want you to pay for the full version. I usually use free ones that include a small credit to the maker of the theme at the bottom of the page (in the footer with the copyright info). Sometimes I’ll just pay the theme maker to have that credit removed if I’m making a site for a client and I want all of the theme’s capabilities unlocked.
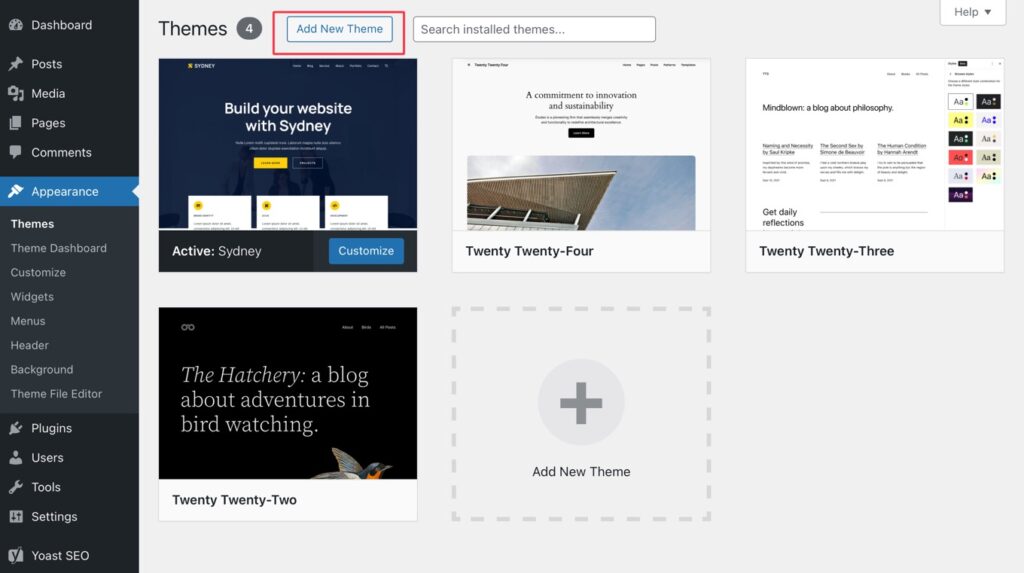
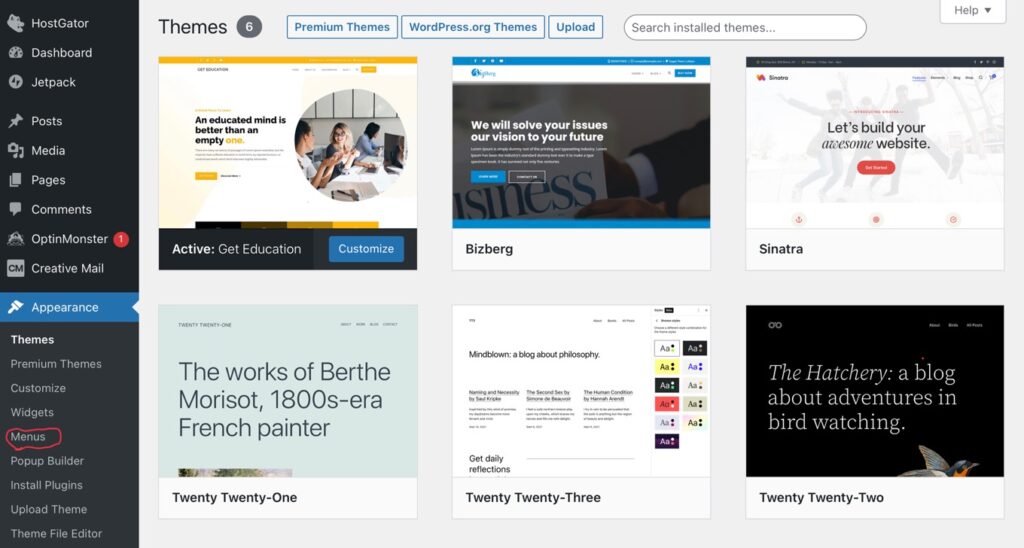
To find this library of free themes, click on “Appearance” in the left column and then click on “Themes” (if it doesn’t go to “Themes” automatically)…
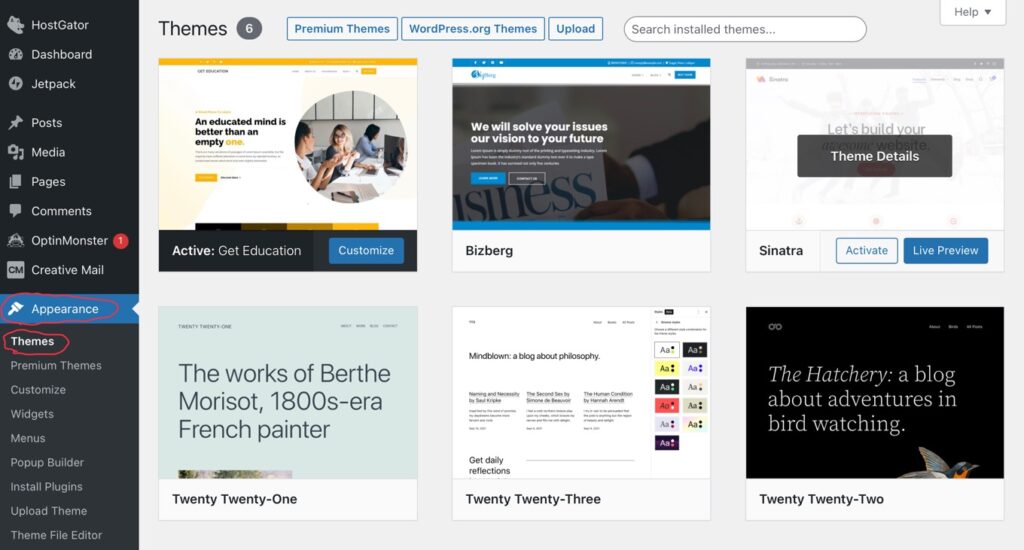
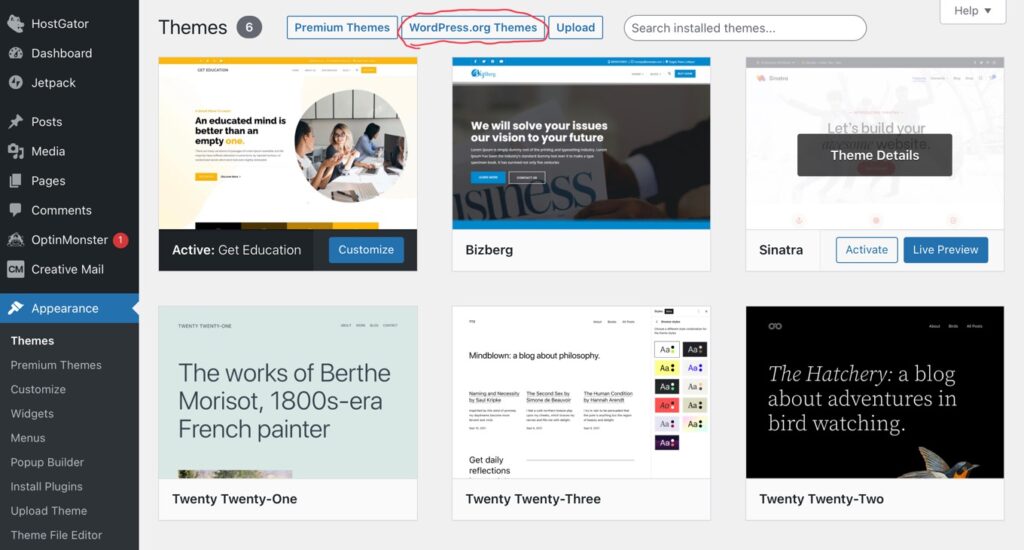
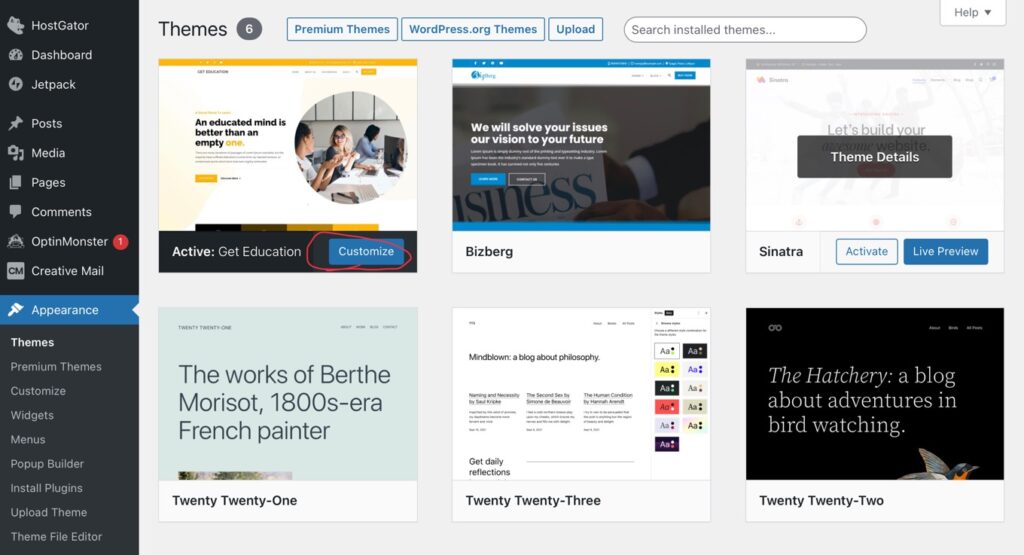
The “Twenty Twenty-One”, “Twenty Twenty-Three”, “Twenty Twenty-Two”, and “Sinatra” themes are all provided by WordPress for free. Many times I just use Sinatra for businesses because it actually looks very business like in itself (with a top-bar for contact info and social links). So sometimes, I find that’s very doable and it’s completely customizable without any limitations (like you can run into with themes designed by others). But themes designed by others can be a lot cooler. Much better designs can be found which are also free (but with a credit at the bottom). To find those, click on “WordPress.org Themes” at the top…
And that, by the way, is only if you’re using a hosting company like Hostgator. If you’re using NameCheap, you simply click on “Add New Theme”…
So now you have a whole world of themes to choose from. Simply browse them or use the search bar and type in words like color schemes or even the type of business you’re in. For example, if you’re a contractor, they’ll have themes for contractors. To choose one, click on the “Install” button on the theme…
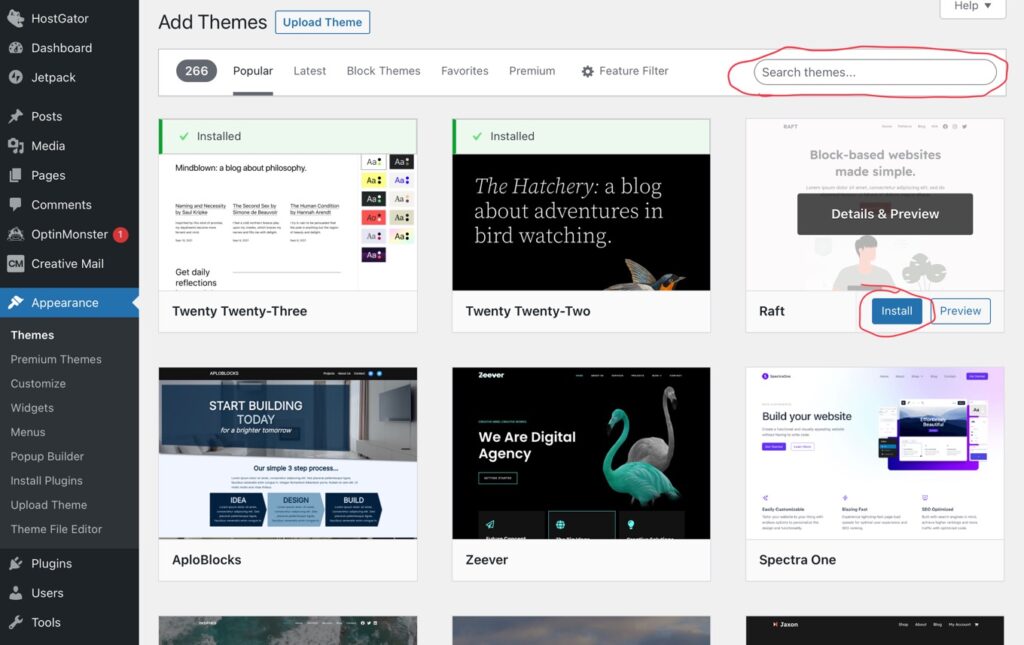
Then, when the button says “Activate”, click on “Activate”.
Next, we’re going to start customizing the theme. You do that by clicking on the “Customize” button on the theme…
Customizing Your Theme
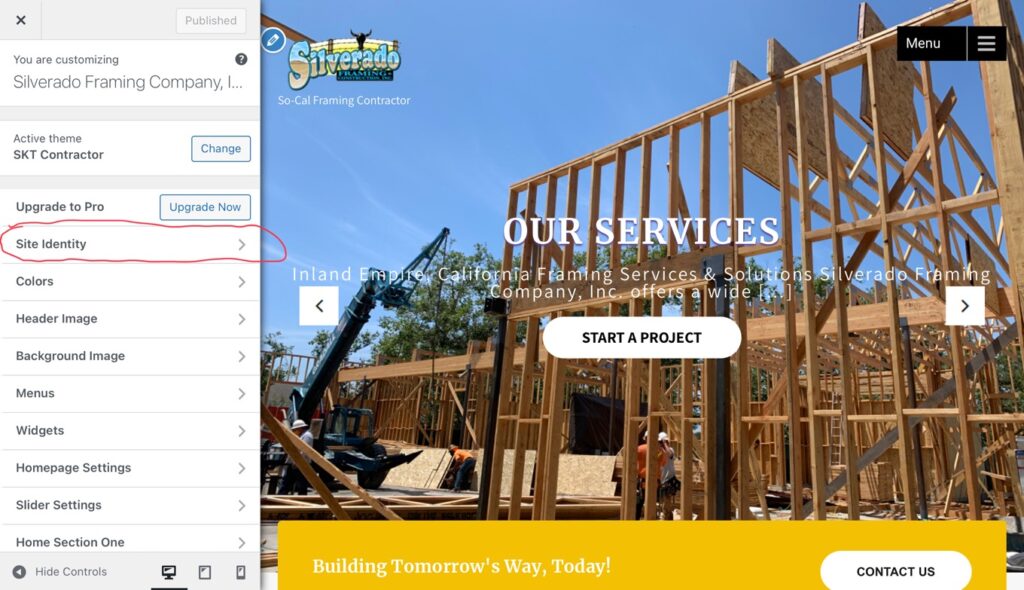
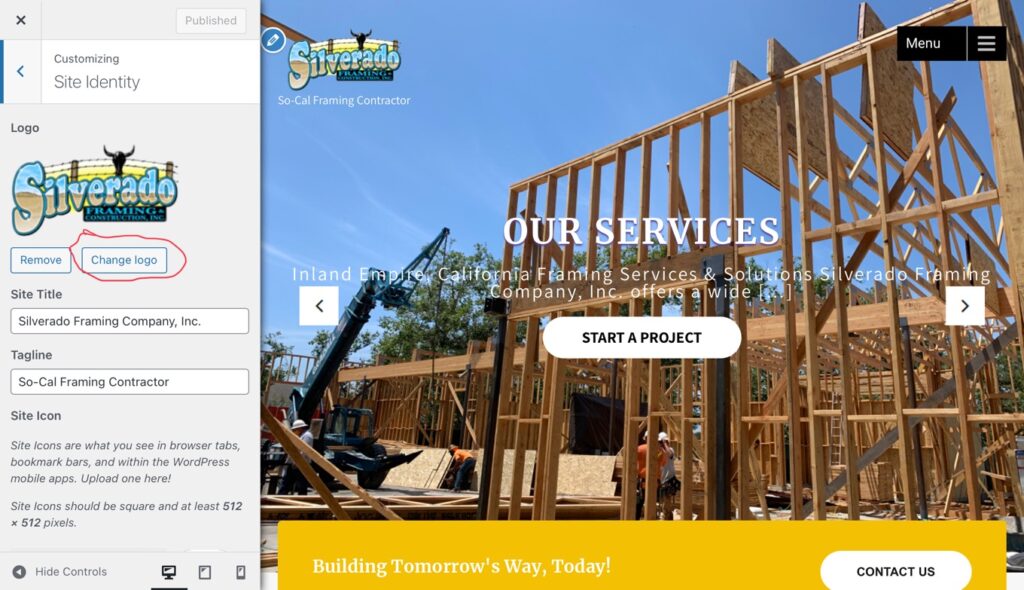
You are now in the customizer. This is where you control everything that has to do with the look of your website. Let’s start with adding your company logo to your site. First, click on the “Site Identity” section…
Next, add or change your logo by clicking on the “Change logo” button…
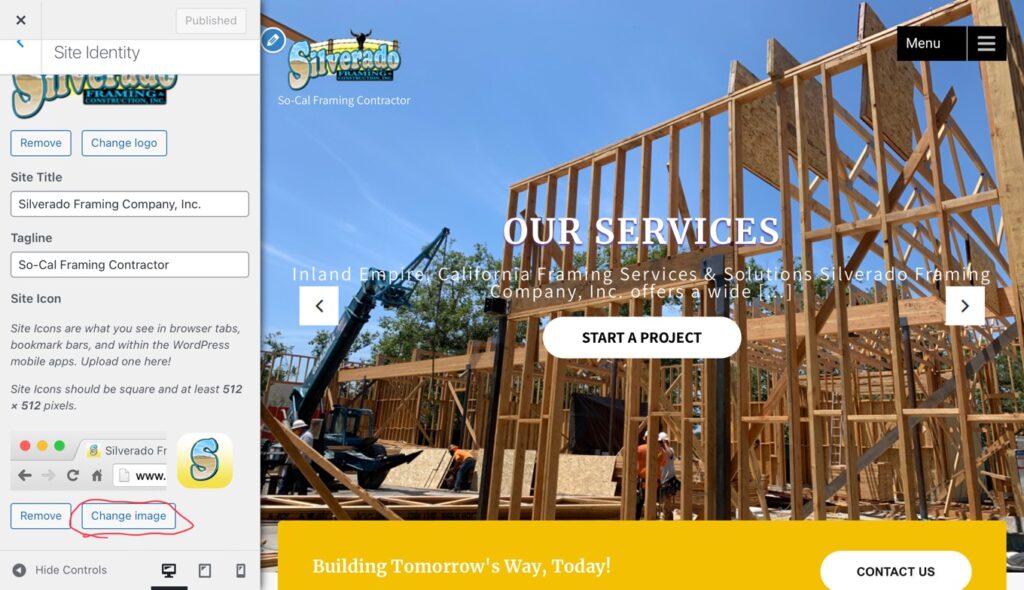
Also in this section is where you upload your site icon. Scroll the left column down a bit to find the “Change image” button…
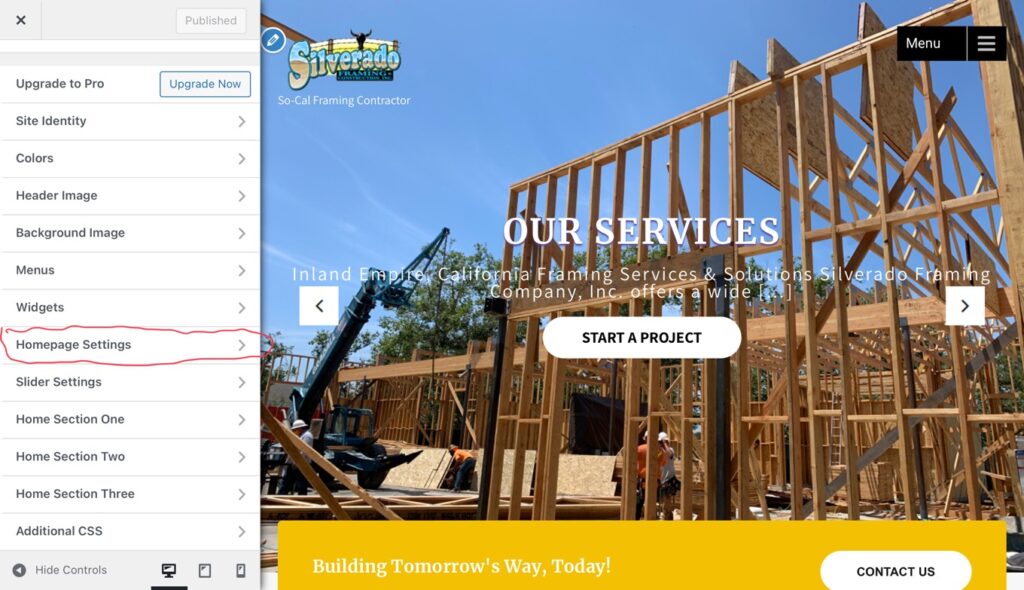
Next, I’m going to show you how to set the homepage (also known as front page). Go back and click on the “Homepage Settings” section…
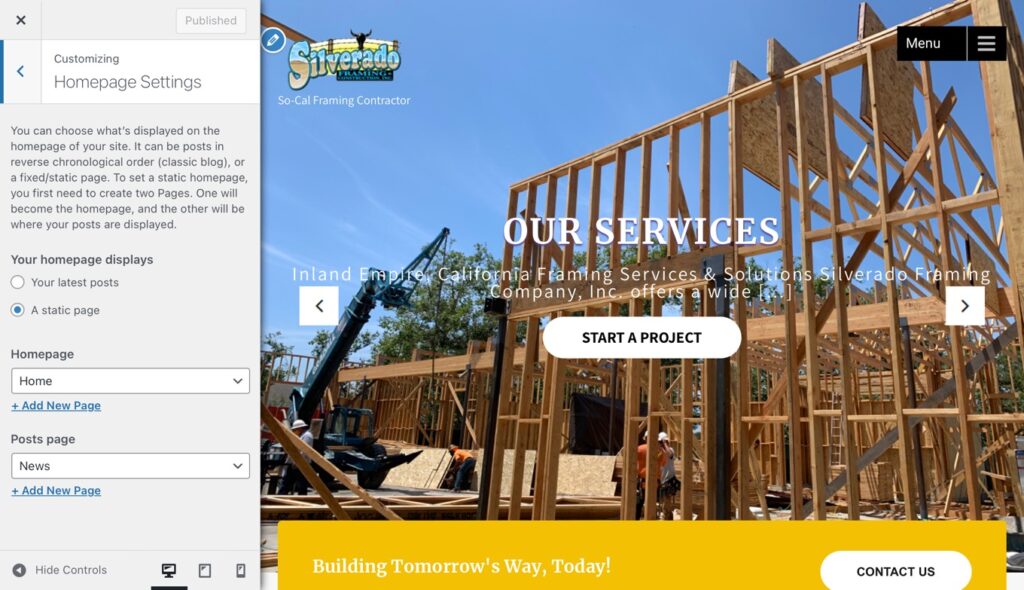
When you’re in the Homepage Settings, set the “Your homepage displays” to “A static page”. This is because you’re building a business website. If you were doing a blog, you would choose the other option of “Your latest post”. But for a normal business site that you just build once and then forget it (other than occasional edits every once in awhile), you’re doing static pages not blog posts. Then, underneath “Homepage” select the page that you would like to be your homepage. You may want to create that page first (or just use the auto-created “Sample page” for now). Finally, if your business would like to have a blog on the site (in addition to its normal/static pages) you can choose a page that acts as your blog page by selecting it underneath “Posts page”…
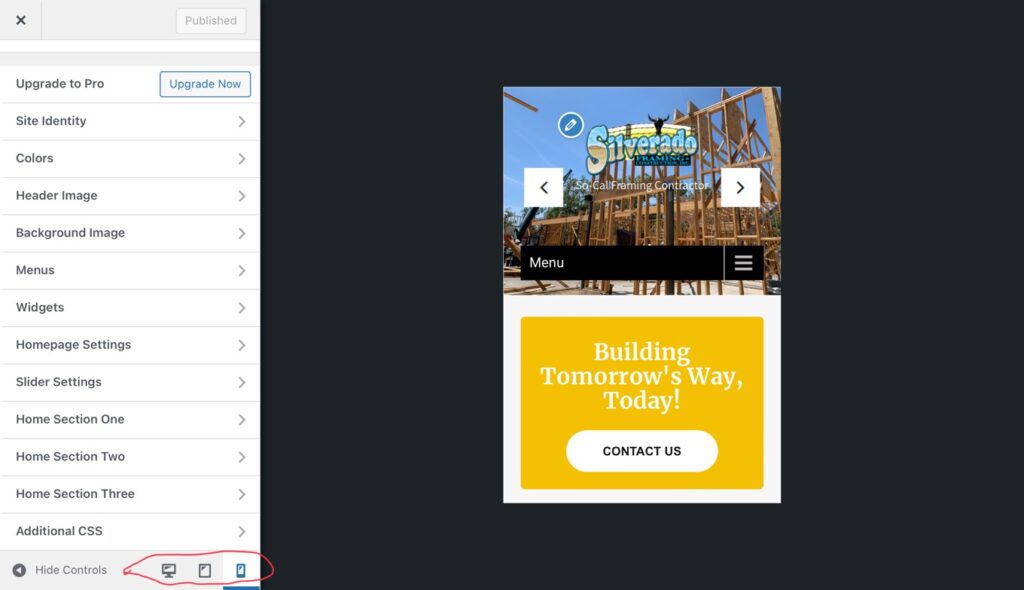
Finally, to close off talking about the customizer, I just want to point out the toggle at the very bottom. That’s where you can see what your site looks like on other devices like mobile phones and tablets. That’s important because most of the traffic that will visit your website will probably be from phones…
When you’ve finished customizing everything else you want to customize here, click “x” at the top left to close the customizer and we’ll begin creating pages.
Creating Pages
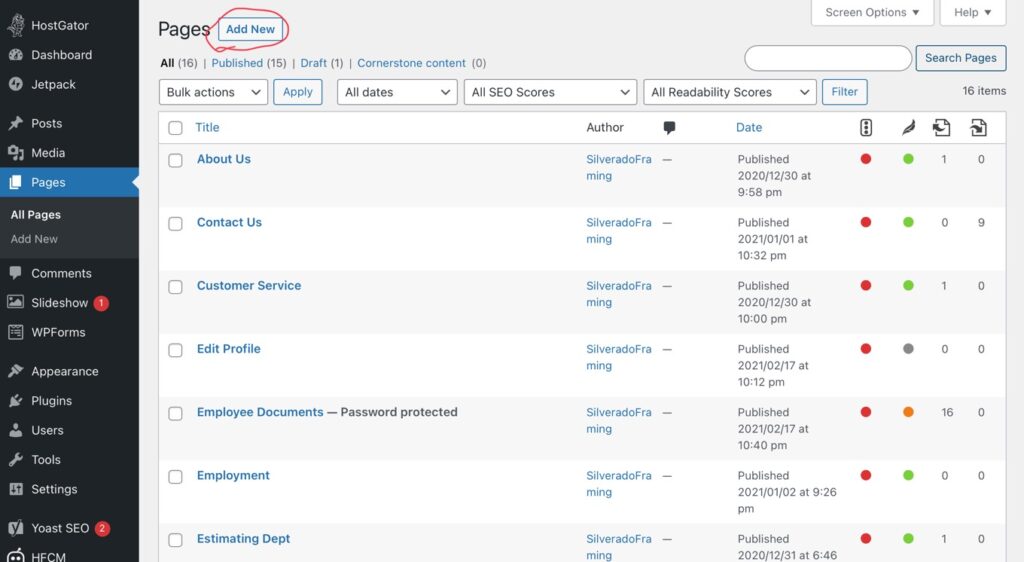
To create pages in WordPress click on “Pages” in the left column. If we were doing a blog, we would click on “Posts” to create blog posts but since we’re doing a business website with normal/static pages, we’re going to “Pages”…
Next, we’ll go to the very top and click on “Add New”…
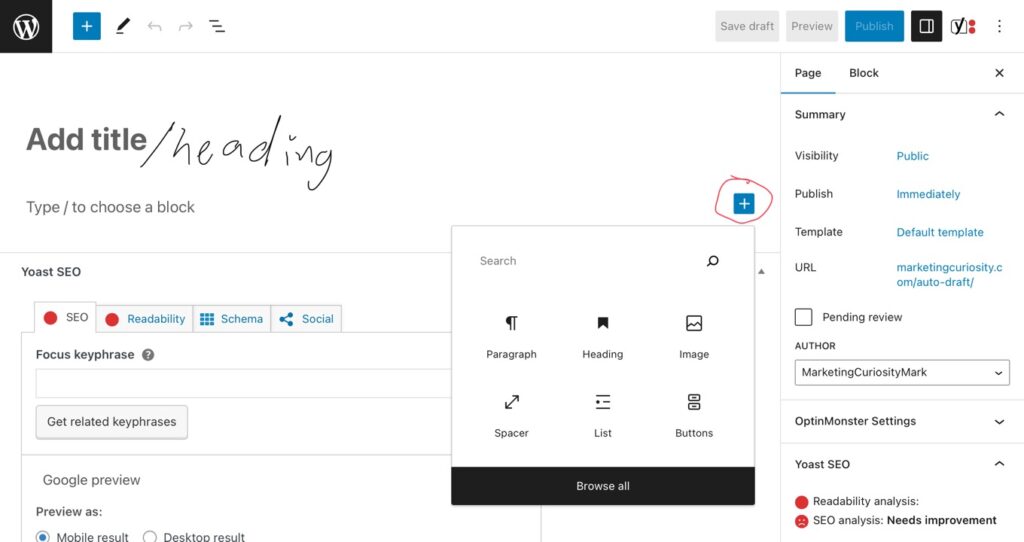
You are now creating a new page. The first thing you do is type the page title, which is also your main heading (what the topic is that you’re talking about). Below that, you add content by adding what WordPress calls “Blocks”. Blocks can be:
- A heading
- A paragraph
- An image
- A video
- A YouTube embed
- A button
- A divider
- A list
- A customer testimonial
- And many more
You just keeping adding whatever block is needed next by clicking on the little “+” button…
After all your content is written, images are added, and anything else, click on the “Publish” button at the upper right. If you’re editing a page after it has been published, the button will say “Update” (so click “Update” after every change).
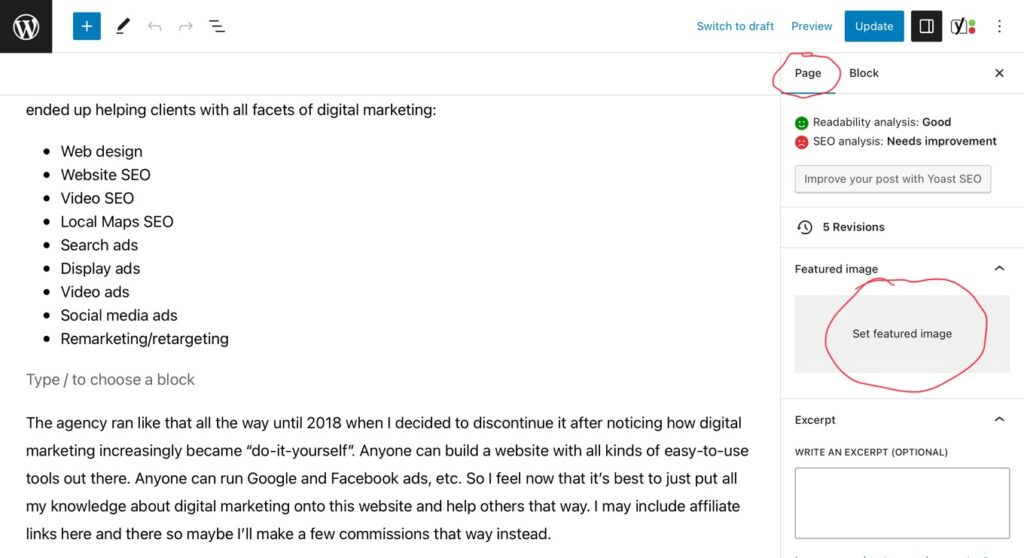
Setting Your Featured Image
The “featured image” is the main image for the page. It’s the image that people see when your page is shared on social media, by text message, and other ways. For example, here’s a news story that was shared on Twitter…

Abc13.com is the website and the circled image is the page’s “featured image”.
To set the featured image in WordPress, go to the right column of the page you’re working on and make sure you’re on the “Page” tab. Then, scroll down to the “Set featured image” rectangle, click on it, and upload your image…
Creating & Arranging the Menu
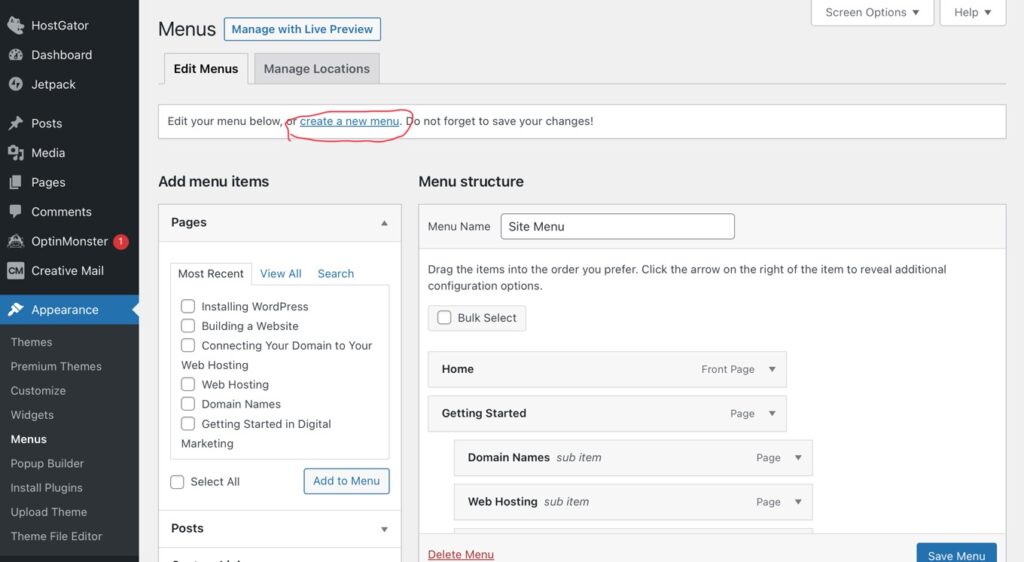
To create and arrange the order of your WordPress site’s menu, go to the appearance section in the left column. When the sub-categories drop down below that, click on “Menus”…
Inside the Menus section, you will see that it is pretty self-explanatory. You first click on “create a new menu” to create your site’s menu. You take menu items from the left portion (under “Add menu items”) and add them to the right portion, that says “Menu Structure”. You can also re-arrange the order of the items in the menu structure so they appear on your site in the order you’d like…
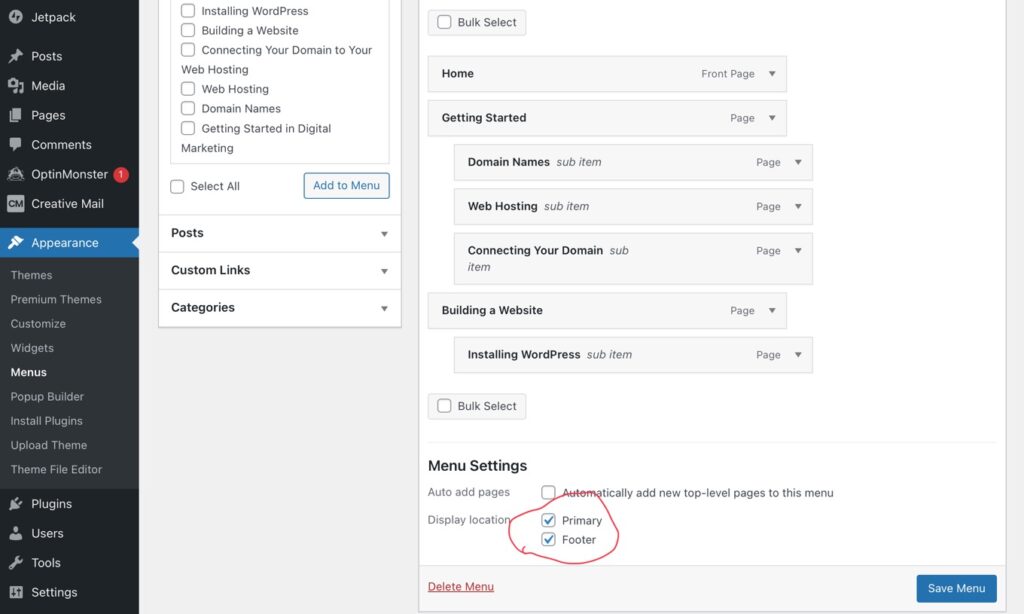
Scrolling down a bit, you will also see that you can select where your menu displays on your site. You should always choose “Primary” (that’s the main menu located at the top of your site) but you can also include the “Footer”…
Well, those are the basics of building a website in WordPress. The next thing you’ll want to be versed on is how to display your contact information so customers can easily order services (or even products) from your business.