Installing WordPress
How to Install WordPress to Your Web Hosting
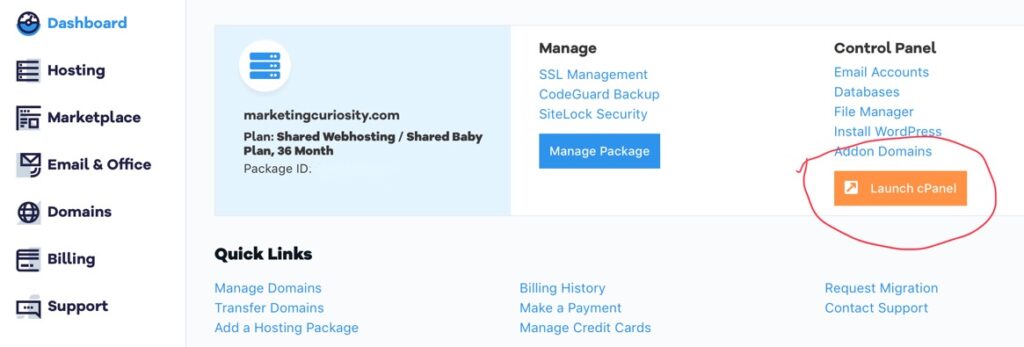
If you took my advice and went with NameCheap as your hosting company, installing WordPress is easy. Inside cPanel they have easy WordPress installation via Softaculous. Log into NameCheap or your similar hosting company, go to your hosting package, and “Launch cPanel”…
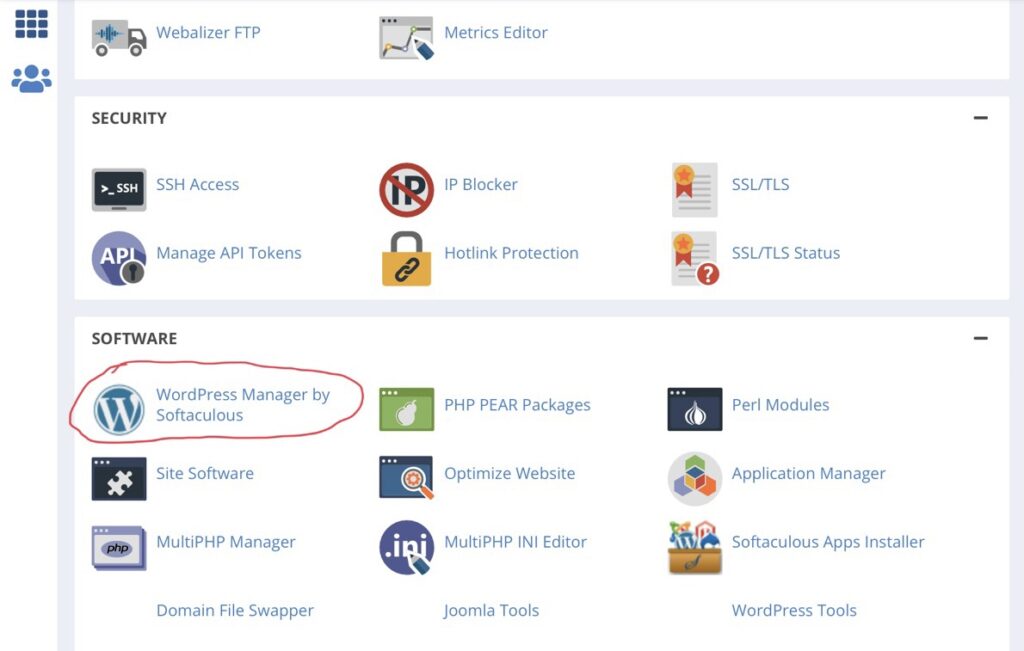
Inside cPanel, scroll down to the “SOFTWARE” heading and click on the “WordPress Manager by Softaculous” icon…
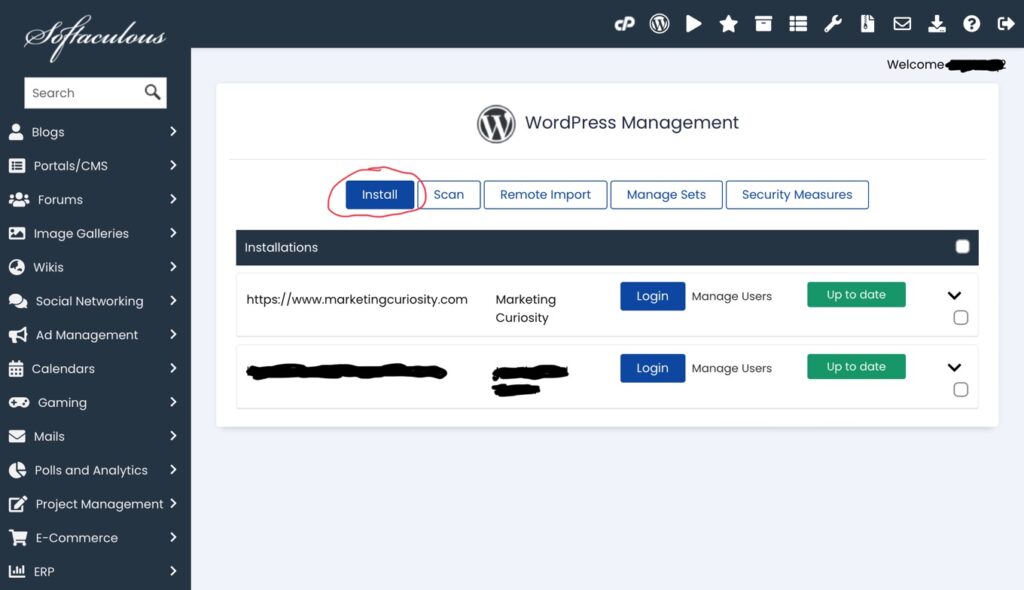
When Softaculous opens, click on “Install”…
On the next page, fill out the information it asks for starting with “Choose Installation URL”. Make sure it is set to “https://www.” and your domain name is selected…
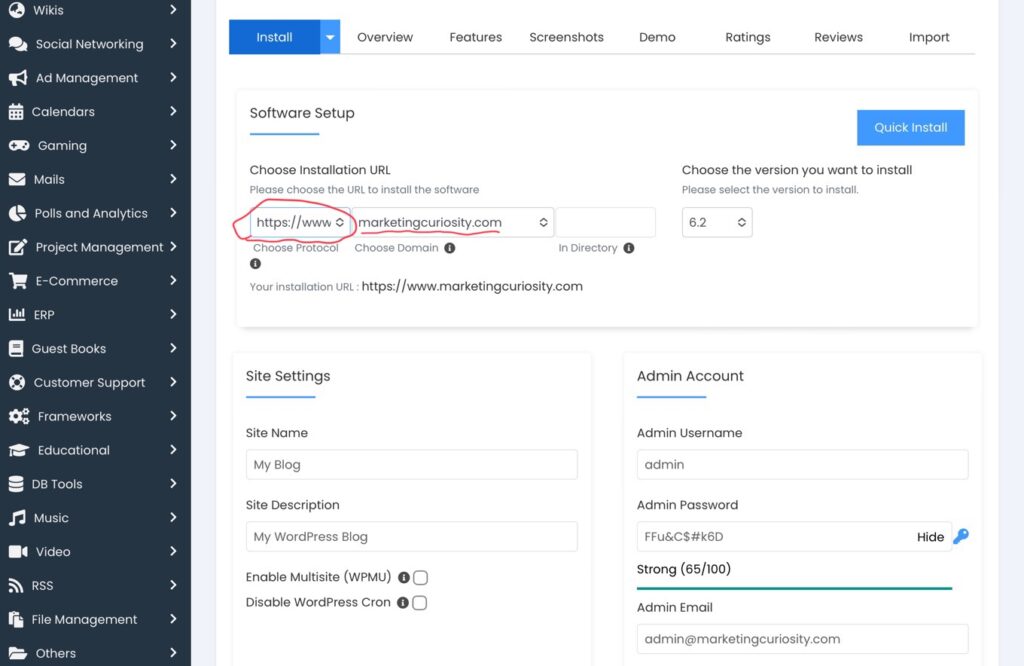
That is, of course, assuming that you followed my previous steps on using SSL and redirecting to “https://www”. If not, go back and read up on that first.
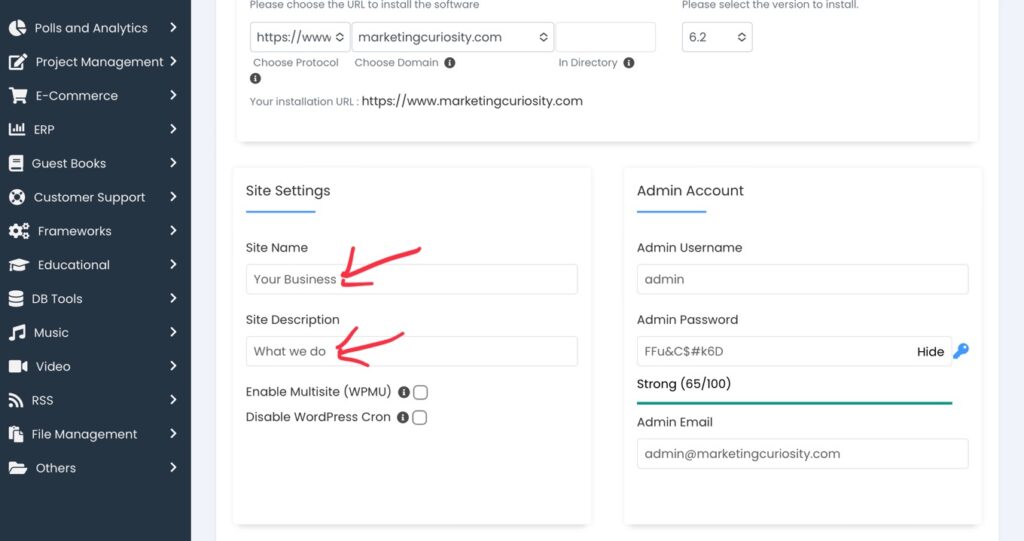
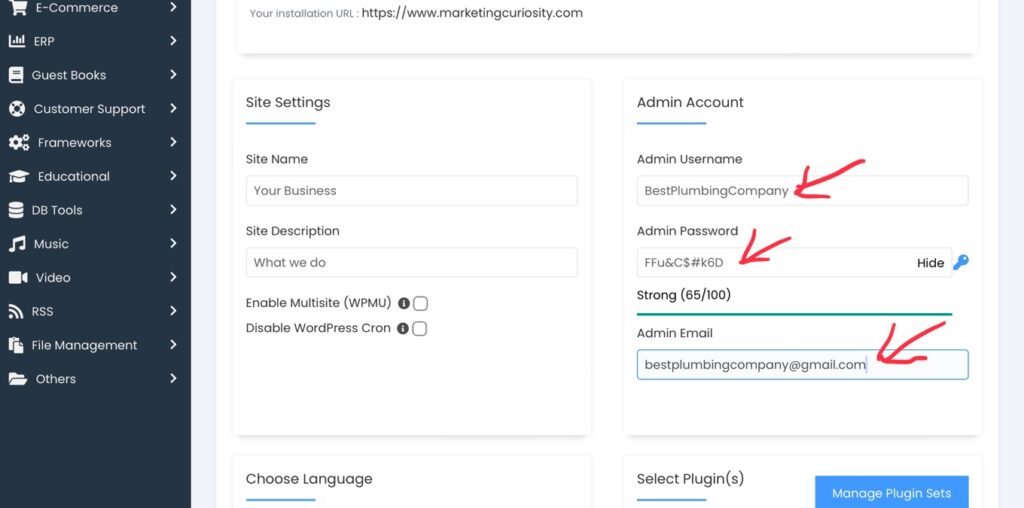
Next, underneath “Site Settings”, add your business name under “Site Name” and what your business does or sells under “Site Description”. These two bits are also important for SEO. I will cover that in the SEO section. It can be changed later, so for now, you can just type any brief phrase that describes your business.
Next, under “Admin Account”, you are going to create a username. This will be your account inside WordPress that you manage your site with. You can use any username you’d like to come up with. I usually use the business name or a combination of the business and client’s personal name. It’s up to you. Just don’t use the word “admin” anywhere in the username. There are many bots that scan the internet, looking for WordPress sites that use “admin” in their username and try to break in to them.
You can then create a password or use the auto-generated one (which is great because it’s strong).
And finally (for the admin account), enter your email address. It’s automatically on “admin@yourdomain.com” but you can change that to your personal gmail, hotmail, yahoo or whatever you have. I always change that for my clients because they always have an email address that they’ve been using for years. Plus, if something happens like you forget to pay your domain name renewal bill or your hosting goes down for whatever reason, you’ll have less trouble recovering things again because you used an outside email address…
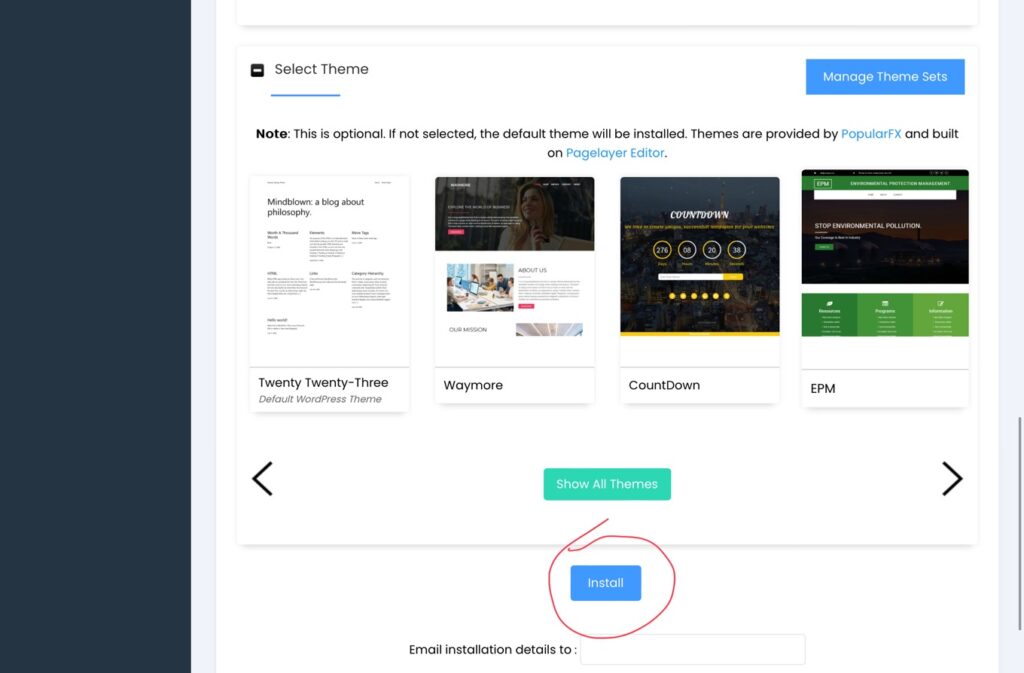
Scrolling down from there, make sure your language is selected then leave everything else blank and scroll all the down to the bottom and click on “Install”. Don’t select any of those themes that you see. They are third party softwares that mess with how WordPress works. After WordPress is installed, there will be a much larger selection of themes. So just click “Install”!..
That’s it! WordPress should now be installed and you should be able to login to it and begin building your site. Except, before you do that, I would login and check the settings.
How to Login to Your WordPress Site
After installing WordPress, your site should email you details on where to login to it. You can also go to your cPanel, open the Softoculous WordPress manager, and then login there. But the easiest way is this… Every WordPress site can always be accessed by going directly to:
https://www.yourwordpresssite.com/wp-admin
So go to your site and wack on “/wp-admin” at the end. That will take you to the login page…
Now feel free to login and I’ll show you how to double-check the site settings.
How to Configure Your WordPress Site’s Settings
Once logged in, use the column on the left and go down to “Settings”…

The next screen will show you all the settings. The main thing to look at is the URL (in both places). Make sure it shows the “https://“ and the “www”. If not then simply type them in and click on “Save Changes” at the bottom of the page.
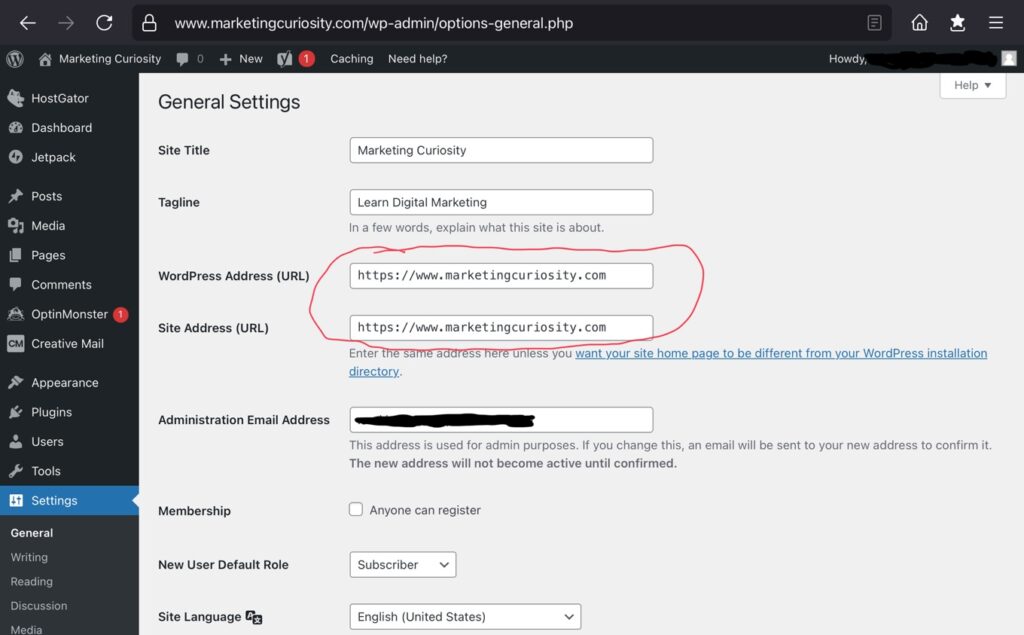
But if the “https” or “www” are missing, then you skipped a step that I covered in the previous lesson. Go back to this page and read the section on “Using Free SSL”. You probably still need to set up that redirection.
If all is good, you are ready to start creating the content of your site…