Advertising Locally On YouTube
In my previous lesson, I covered how to advertise your business online in a local market. I demonstrated how to set up a display campaign in Google Ads. To take that even further, you can do so with YouTube ads as well (which you also set up inside the Google Ads platform).
To start, you will of course need a video (commercial). To make a commercial these days, all you need is your phone and a microphone. Now, iPhones and Android phones both have built-in microphones but they are not broadcast-quality. Their cameras are good but not their mics. So I recommend first purchasing a cheap, plugin, clip-on, lapel mic (what we in the commercial production business call a Lavaliere or a Lav for short). Movo makes a great sounding, cheap as heck lav for only $12.95 on Amazon. So that will cover professional sounding sound- now when you shoot, just make sure you have good lighting (which you can do by utilizing the sun and film near a window). Smartphones handle natural light sources amazingly!
Next, either film yourself speaking on camera or film a hired actor or spokesperson if you don’t want to be seen on camera yourself. I don’t recommend any kind of animated video. People are watching YouTube because they want to see real people. To craft your script (the things you’ll say in your video), you should start by asking a question. This question will target those you have a problem that your business solves. For example, a car dealer would say: “Is it time for a new car? Then…” Now you go into all the sales points. Talk about all the great things about your business. And finally close it with your incentive or special offer and your contact information (like your web address). And you can simply say your web address verbally. There is no need to put graphics in your video. When you set up the video ad in Google Ads, they will place a clickable graphic over the top.
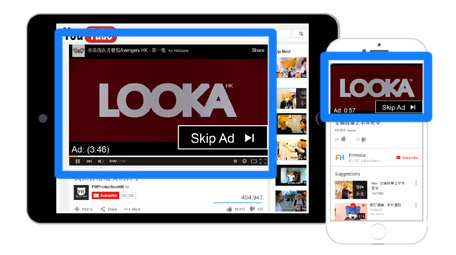
It’s likely that you won’t read through your script in one take. You’ll probably have to edit your video. If you have an iPhone, you can edit your video with the iMovie app that comes with your phone. If you have an Android, there are many video editing apps in the app store that your can choose from. Just make sure to film and edit your video horizontally (not vertically). The reason being is there are more opportunities to show your ad on YouTube when it is horizontal, like with these…
Then of course, upload your video to your YouTube channel. It will also be helpful to use all the video SEO instructions that I taught in that lesson.
Setting Up Your YouTube Ad Campaign
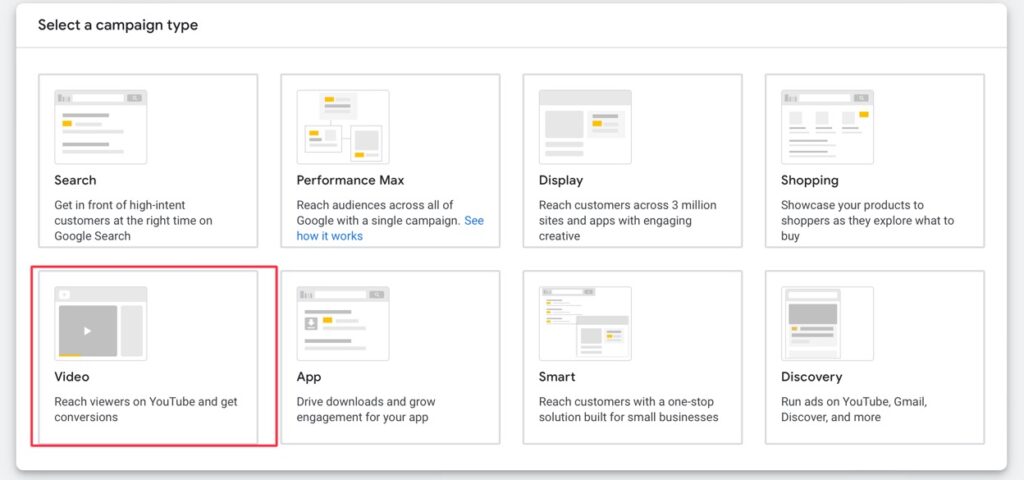
To set up your YouTube ad campaign in Google Ads, start with the same instructions I taught you in the display ad setup. Except, instead of choosing “Display”, choose “Video”…
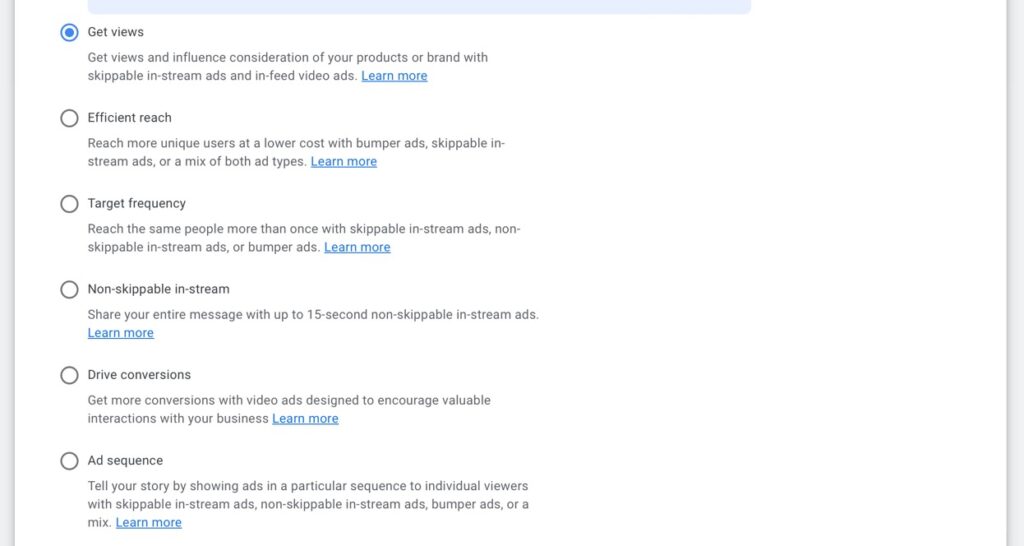
Next, you can simply use the “Get Views” option that it will be automatically set on. That’s the basic/normal method that most people use. There are other options like ones that turn off the skip feature. But actually, you want the skip feature. Allowing people who are not interested in your ad to skip, saves you money as you don’t pay for those views. You only pay when people watch past the point of being able to click (i.e. people who are interested). So the basic, “Get Views” option is fine…
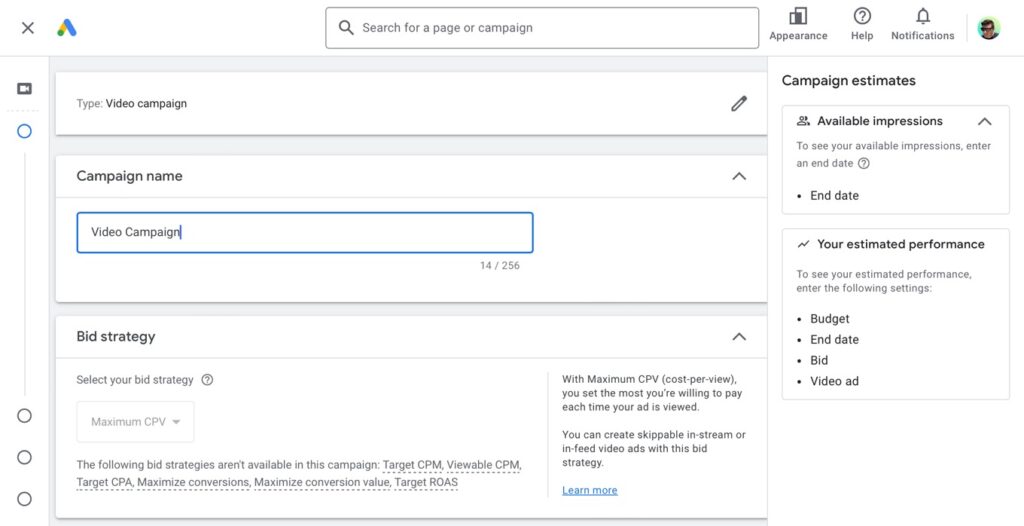
On the next page, it will ask us to name the campaign. I’m just going to put “Video Campaign” to differentiate it from other types of campaigns I might have like Display, Search, or Remarketing campaigns. Underneath that, we’re stuck with only one bid strategy, “Maximum CPV” (CPV meaning: Cost Per View. That is because we chose the “Get Views” option previously and that is fine…
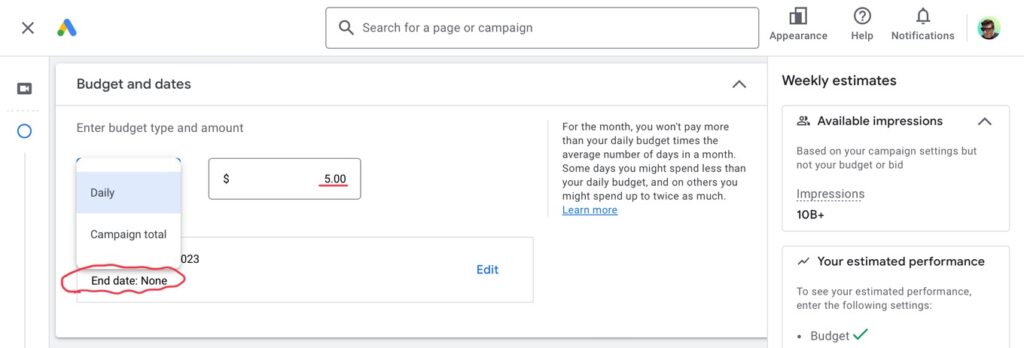
Scrolling down to budget and dates, we’ll want to change it from “Campaign total” to “Daily”. The reason being is, “Campaign total” will make the campaign a one-time run. Whereas, if we choose “Daily” we can run the campaign indefinitely and start and stop it anytime we want to run advertising. You can also always make changes to your ad, settings, etc. So if you want to run a temporary ad (such as advertising a special for a limited time, for example) you can still do that. You can also delete the campaign and create new ones as you wish. So I just use the “Daily”/indefinite option.
You’ll notice after switching to “Daily” that the “End date” for the campaign says: “None”. Next, enter in a daily budget. I usually start with $5 a day. I can always increase it if need be but $5-$10 should be fine for a local campaign…
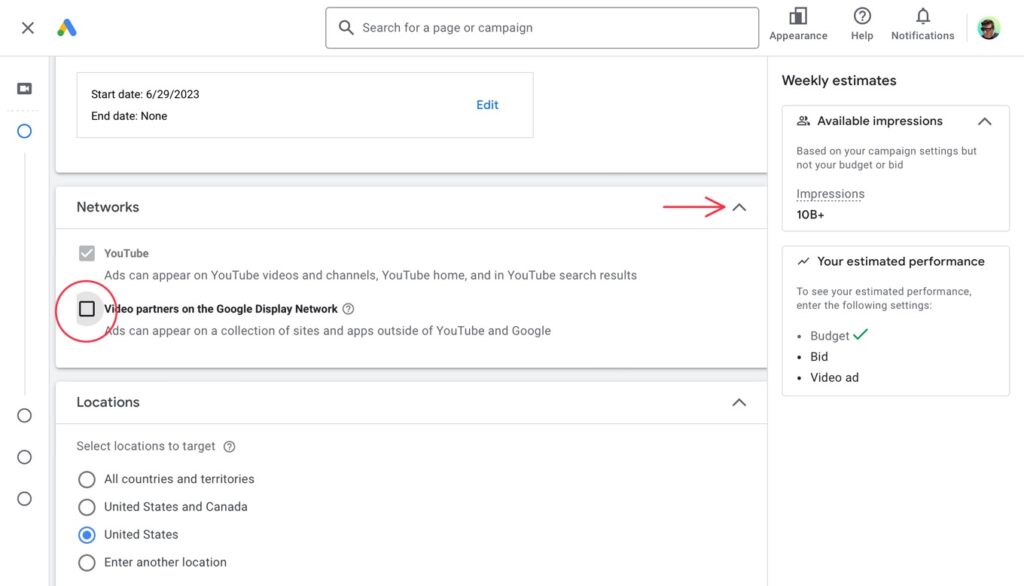
Scrolling down to the next section, we arrive at the “Networks” section (you might have to open it with the drop-down arrow). Uncheck the “Video partners on the Google Display Network”. You DO NOT want it checked. You want to ONLY run the campaign on YouTube. The Google display network is good for display ads but it’s trash for video ads. Or at least, create a second campaign that runs only on the display network so you can monitor them separately. But you’ll likely turn off the campaign that runs on the display network…
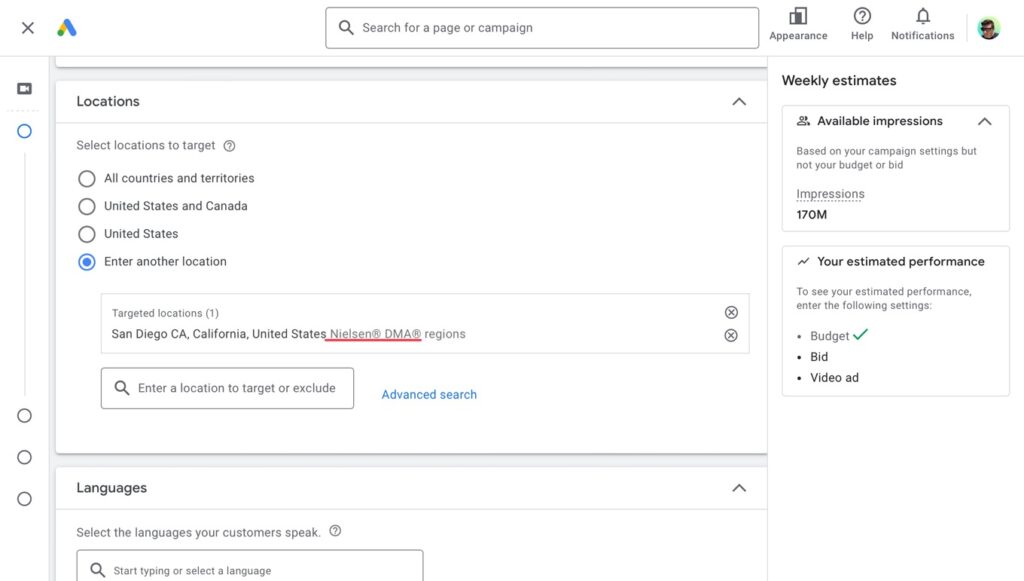
Below the “Networks” section, we arrive at the “Locations” section. Just like with the local display campaign, we can target the entire metro area of your city by selecting the Nielsen DMA region for your city. You can also enter zip codes (useful in rural areas). First click the “Enter another location” circle to open the local targeting field…
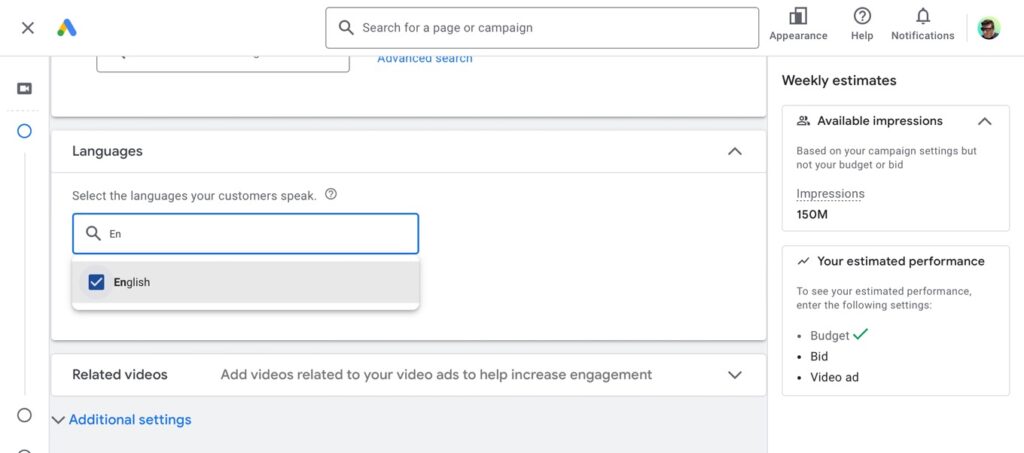
Next, you’ll of course want to enter “English” as the language (assuming that your video ad and website are in English)…
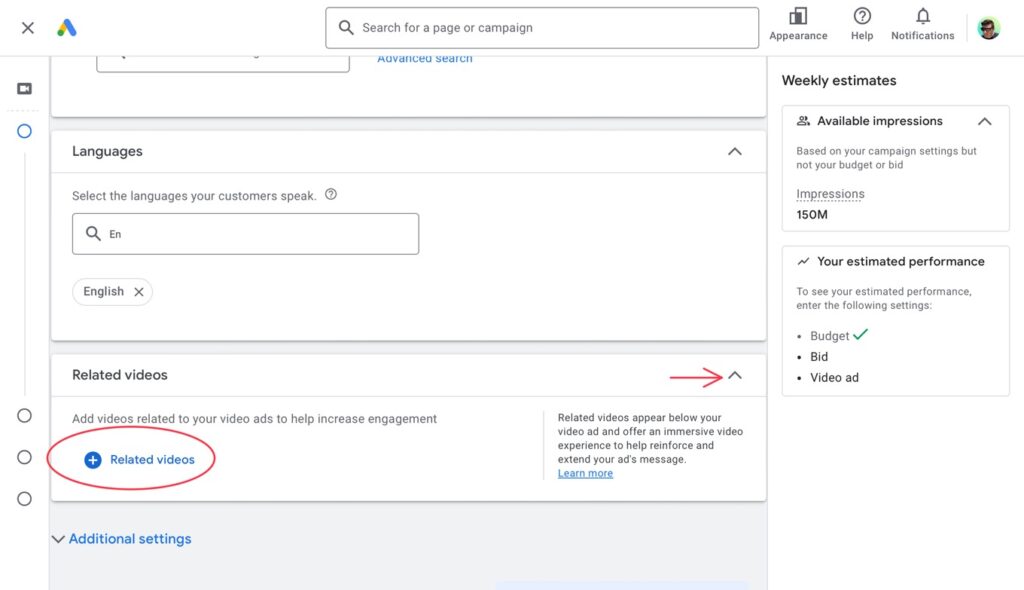
Next, there is another drop-down section you can open if you want to add related videos. So if you have a YouTube channel with more videos that promote your business, you can add them here. The benefit is, your ad will appear larger on the page on YouTube (meaning: you’ll take up more space and stand out more). You can also remarket to people who watch those videos. So you can get creative and build different funnels. I’ll go over all that in my lesson on running remarketing ads. However, you do not want to add related videos if you’re just trying to direct people to a certain place to take action there (such as your website) and nowhere else. Only add related videos if your strategy is to increase engagement and grow you’re following on YouTube itself…
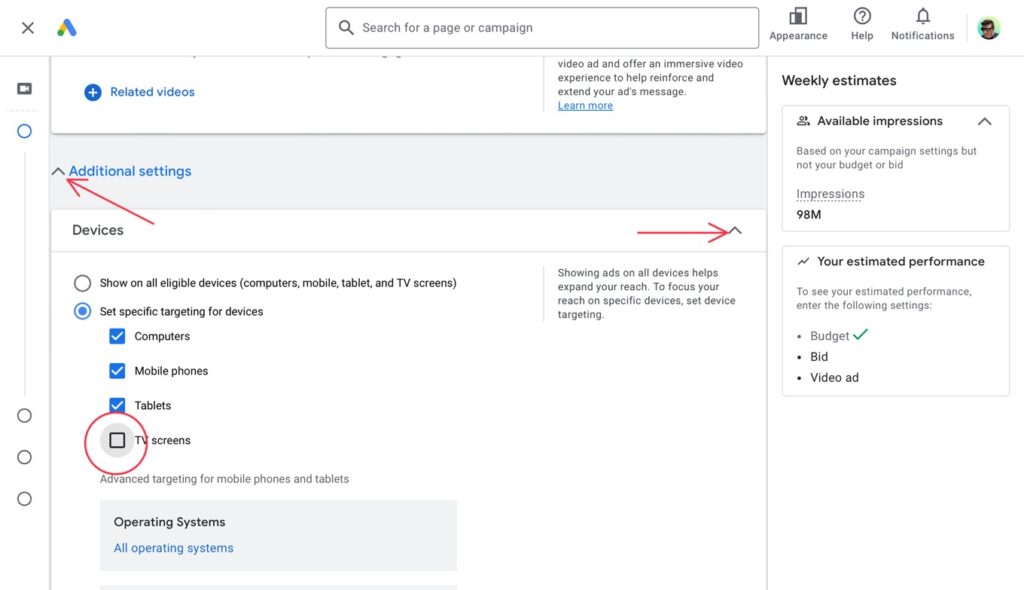
Below that, you will see the “Additional settings” drop-down arrow. Go ahead and open it because there are some important things to set. Firstly, under “Devices”, we’ll want to uncheck “TV screens”. We don’t want our video ad to show on TV screens because people who are watching your ad through the YouTube app on their TV can’t click on anything that sends them to your website. And you always want to send traffic to your website for analytical purposes and to remarket to them again later. All the other settings in this section are fine…
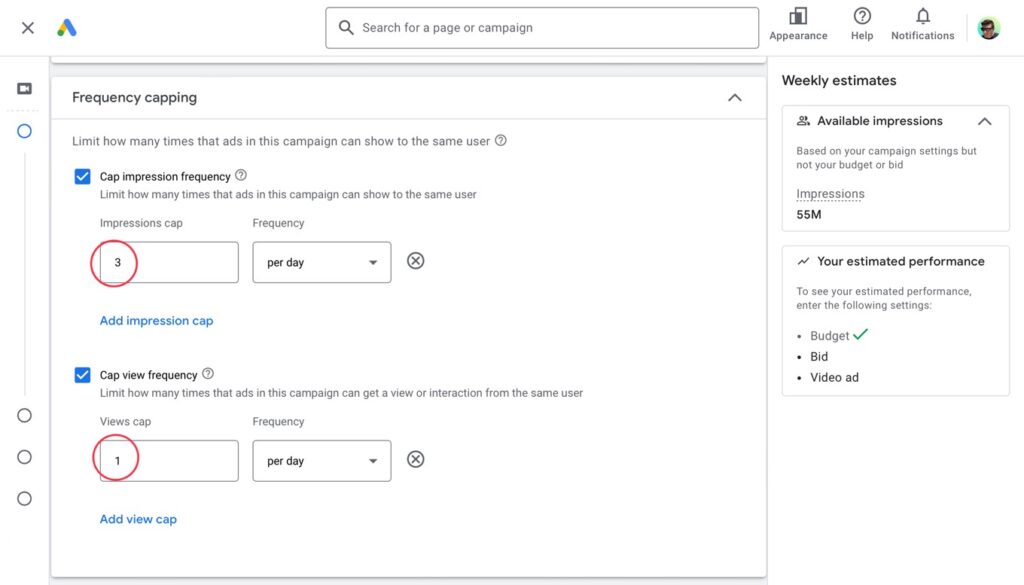
Secondly (still inside the “Additional settings” drop-down), we’ll want to open the “Frequency capping” drop-down. Now check both “Cap impression frequency” and “Cap view frequency”. Type “3” for Impressions cap and “1” for Views cap (“per day” on both). This will show your ad to the same person not more than three times a day and only allow them to click on your ad not more than once a day (which is the part you’re paying for, the views). What this does is drastically limit how much you advertise to one person (saving you a lot of money) and keeps from annoying YouTube users too much. You don’t want them to get fed up with your business!..
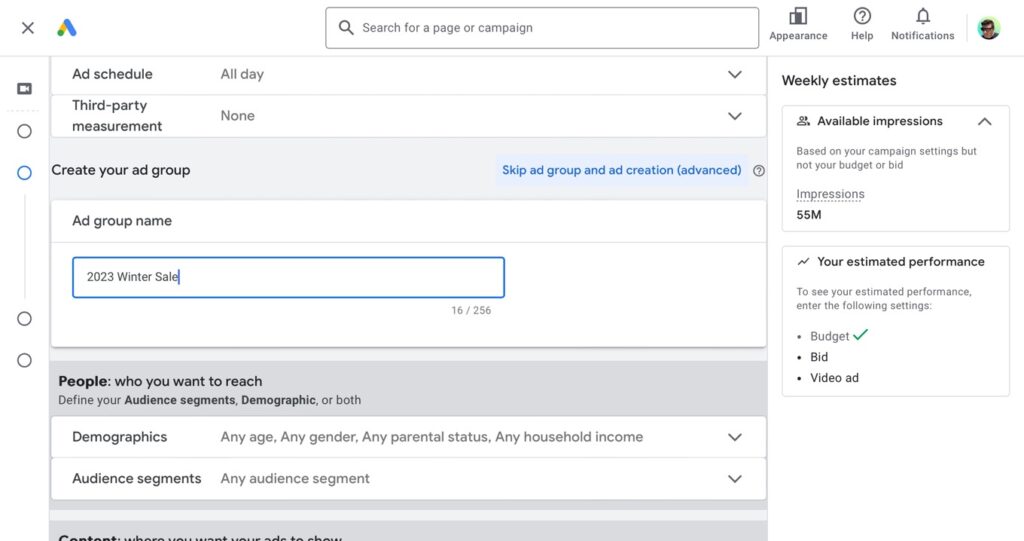
Now we can scroll straight down to “Create your ad group”. For naming the ad group, I like to title it the name of the video ad, or if I’m testing different targeting methods, maybe I’ll title it the targeting method. In this case, I already know the exact targeting method I’ll use so I’ll just title it the ad name…
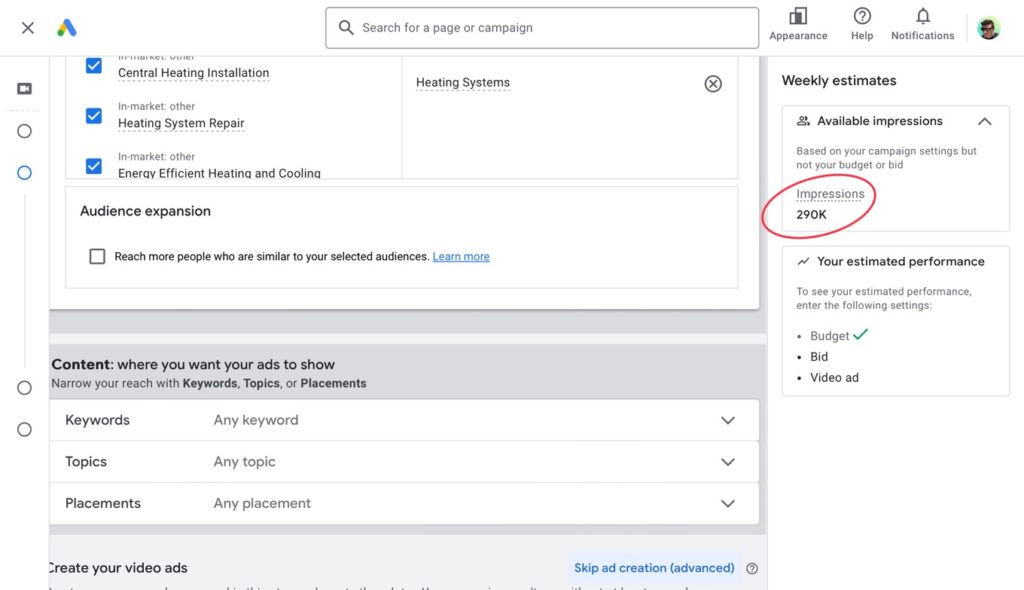
Next, we’ll set our targeting. We can use the same targeting that we used in the display campaign. You’ll have all the same options here (actually even more since you can even target specific content if you want, i.e. specific YouTube videos). But in the local arena, what we want to do is target the user, not the content. So I’ll use the exact same targeting method of “In-market: heating”. I just opened the “Audience segments” drop-down and then searched for “heating” in the search field. Like I explained in the display campaign lesson, you want to use “In-market” over “Affinity” because “In-market” means the user is actively in the market…
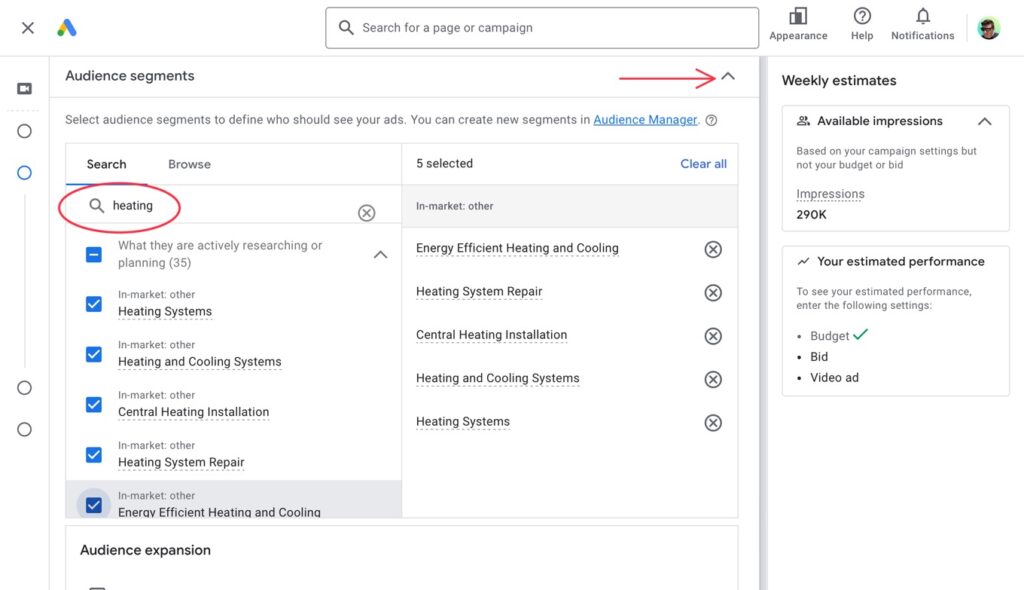
Below that, you’ll see “Audience expansion”. You can leave that unchecked. That will only overspend your budget. It’s just another ploy to get you to spend more. Also notice on the right column how the available impressions count has dropped to 290,000 (down from 55 million). That’s a good sign. That means we’re really targeting now!..
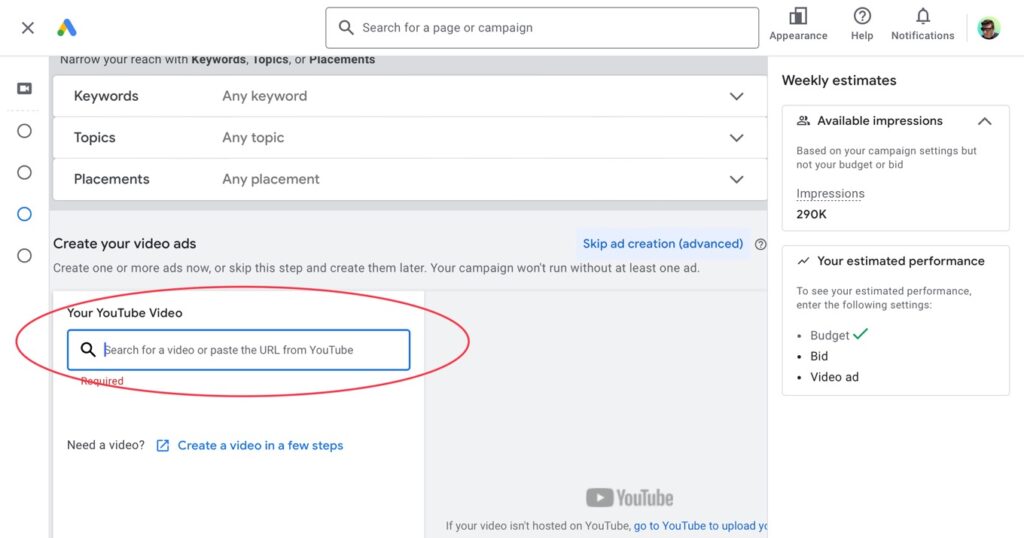
Next, we’ll scroll past the “Content” section since we’ve already targeted our audience. We’ll go straight to “Create your video ads”. In another tab, go to your YouTube channel and copy the URL of your YouTube video that you will use as your video ad. Now come back to the ad setup and paste it in the search field of the “Create your video ads” section…
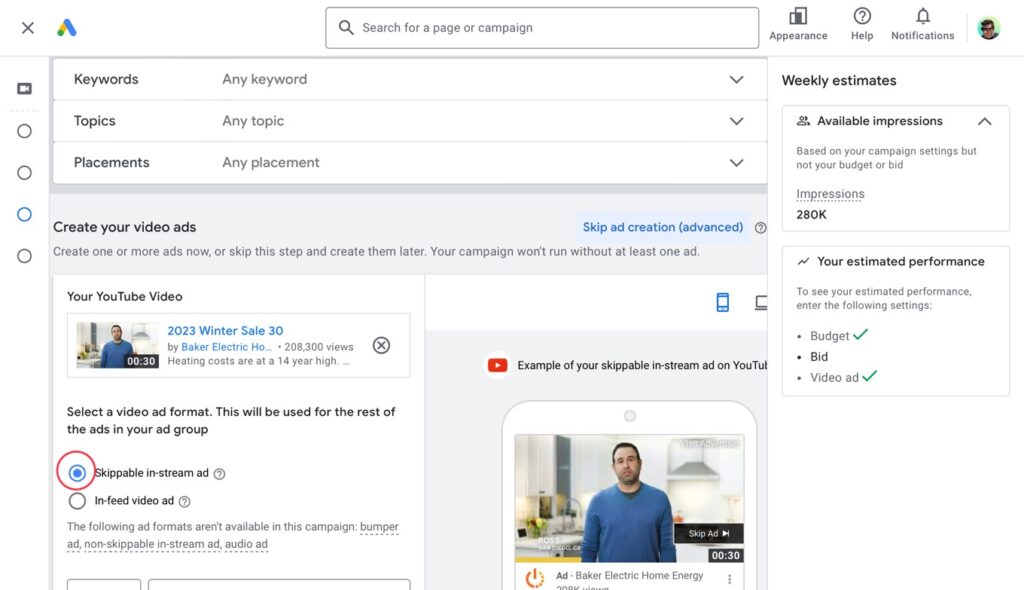
Now you should see your video appear as an ad preview. Click on the “Skippable in-stream” circle. Once again, this is what makes your ad skippable so that people who are uninterested skip, and you don’t pay. It’s actually really cool!..
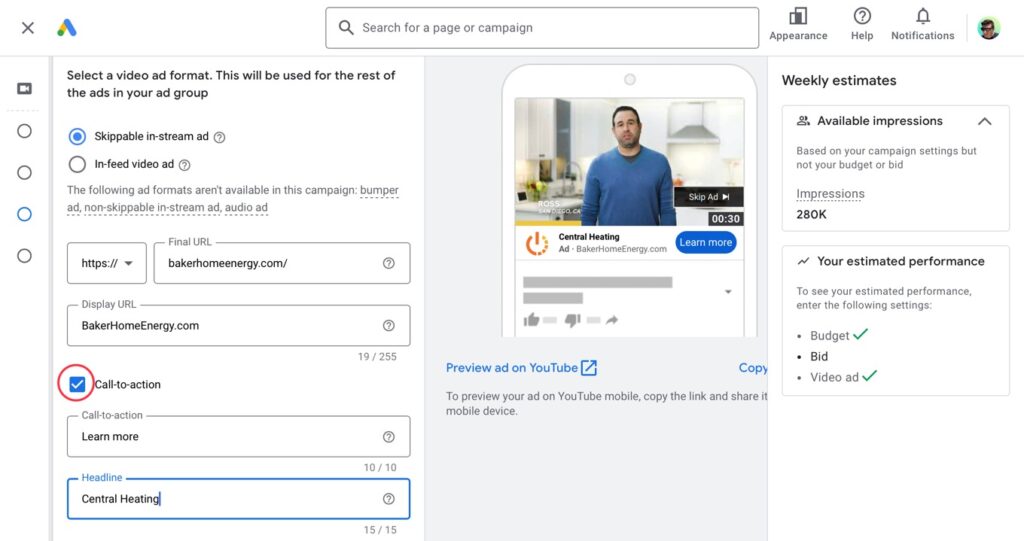
Next, add your website’s URL and then type the display URL. The “display URL” is your opportunity to write it out in an ad-friendly way such as capitalizing the the first letter of each word…

Now click on “Call to action” so it’s check marked and add a call-to-action such as “Learn more”. Then type a headline. It can only be a short, two-word headline (fifteen characters). Notice in the preview on the right how the ad is now coming together…
Next, you can skip past the “Add URL options”. What that does is allow you to add a tracking link (which you would create elsewhere such as Google-approved tracking programs). But since you’re likely using Google Analytics, you can connect your Google Ads and Google Analytics accounts together and not worry about tracking links. So you can skip past that section and not even open the drop-down…
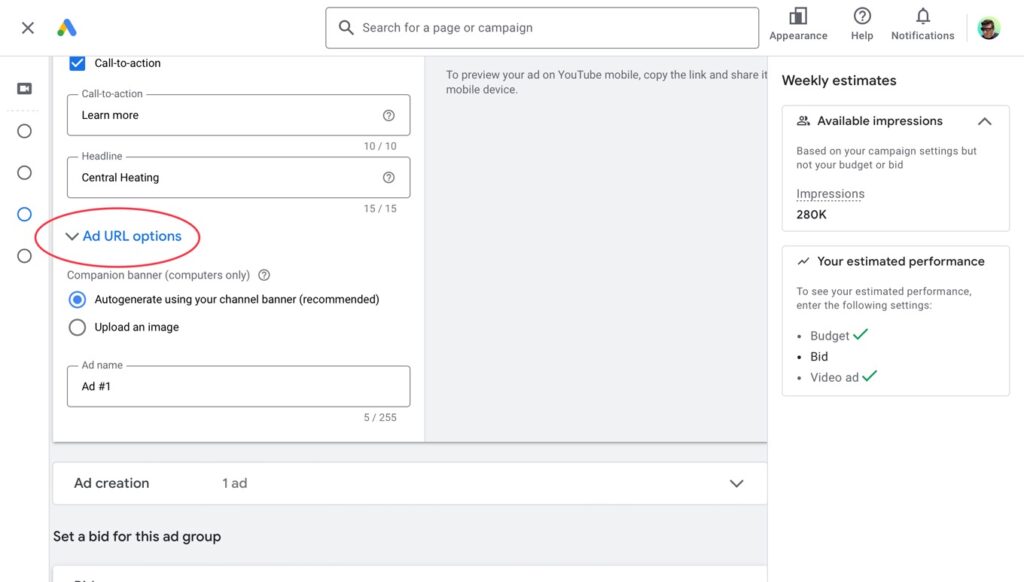
Immediately below that, you can choose to let Google autogenerate your ad’s banner with your YouTube channel’s banner. I actually recommend that as they do. It’s likely that your channel banner is something that will work in your ad as well. Also, if you do click on “Upload an image” and upload a specially designed image, for some reason, it always comes out looking very low resolution when it’s displayed to the viewer (even if you upload a very high res image).
Next, name your ad. Since I also named the ad group the same name, I’ll just tack on the word “Ad” at the end…

If you have created multiple videos and you’d like to run them all (having the system rotate them) you can create more ads in the next section. Just open another “Ad creation” drop-down (another extra drop-down will appear each time you create another ad). If you’re all set, just skip it and go to the final part…
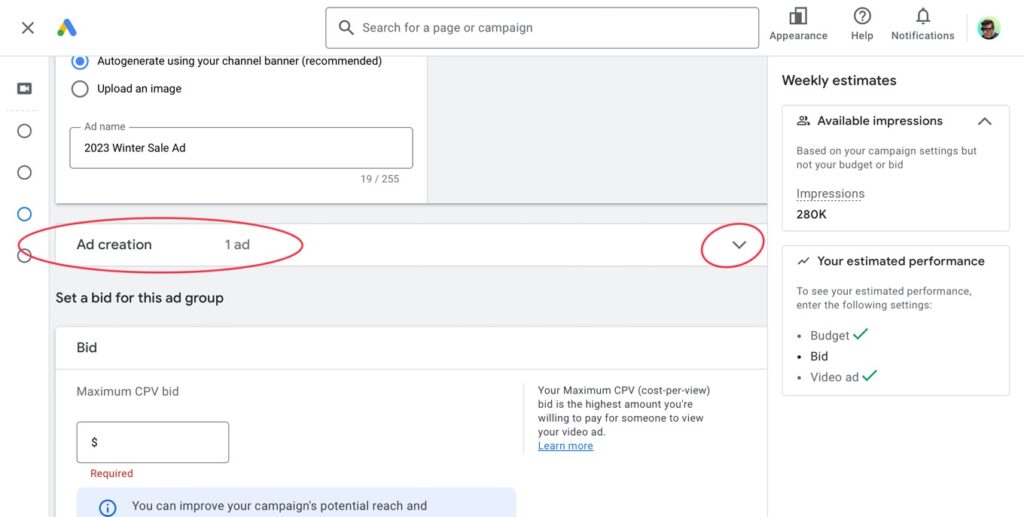
The final part is to set your bid. You can see below that it gives you a little hint on what to bid. That actually looks accurate. I usually start with $0.05 cents and then increase it if I need to. I probably would have raised it to about $0.09 cents anyway. If that number seems high, it is (for a national campaign) but since this is only a local campaign, it will be fine since the traffic is much lower…
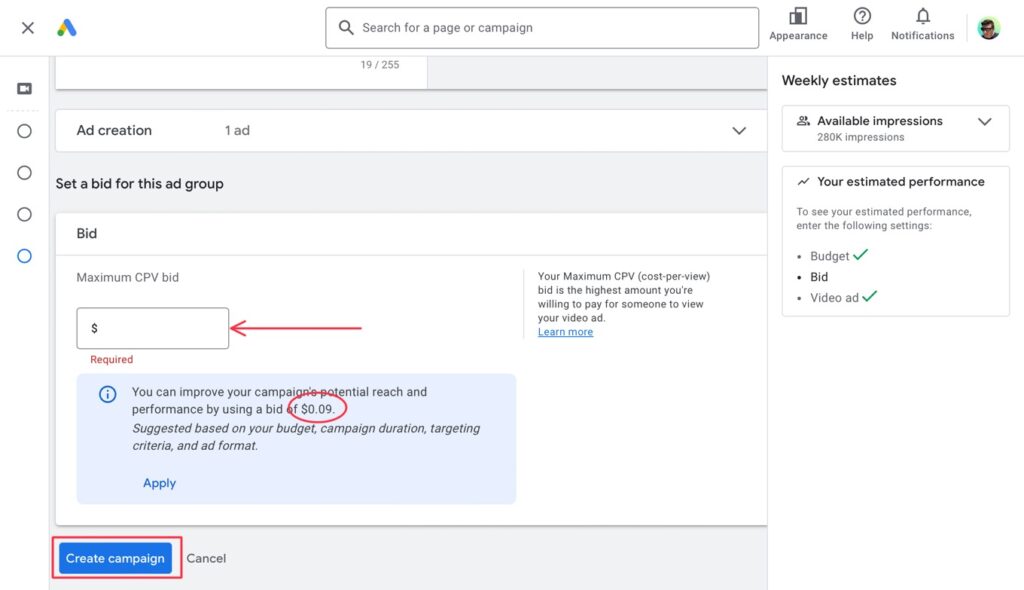
Finally, click “Create campaign” and you’re done! Now you will have to wait about three days for them to review your ad before it goes live.
In my next lesson, we’ll learn how to successfully advertise locally on Facebook and Instagram…