Advertising Locally With Meta Platforms
(Facebook & Instagram)
Just like with YouTube and Google display ads. I don’t recommend advertising on Facebook or Instagram nationally. It would be much too expensive. If Meta Platforms is taking all of your profit margin, what would be the point? So if you’re a local business, it could be a good idea. However, ask yourself if you still see Facebook and Instagram as viable social media platforms moving forward. A lot of people have moved on from Facebook in the past (and moved to Instagram). Fast forward even further, and the’ve moved on from Instagram too with the introduction of TikTok, YouTube Shorts, Reddit, and Snapchat as well. But if you still feel they have a future, here are the tips and tricks I learned in the years that I used to advertise on Facebook and Instagram…
Always Use Video
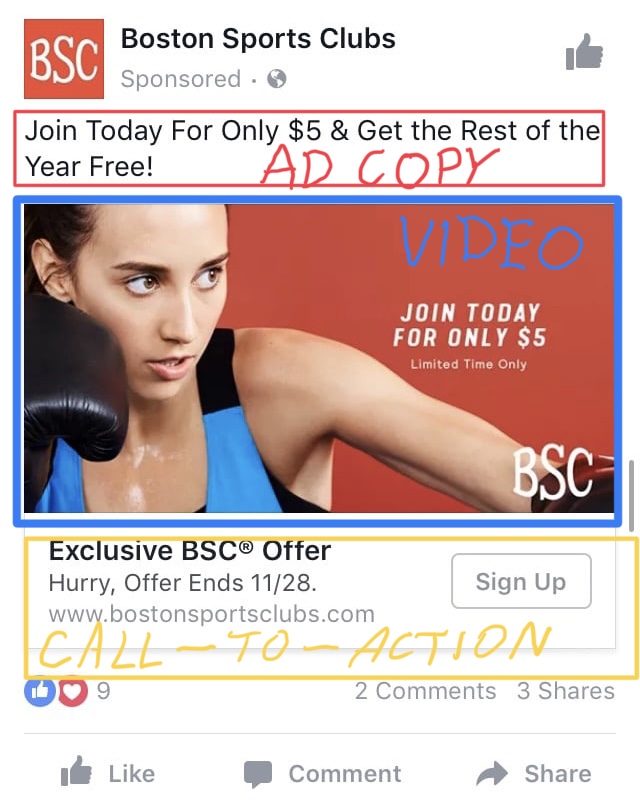
First of all, you should always use video as your creative. It’s the cheapest type of ad you can run on both Facebook and Instagram, but more importantly, it’s more engaging. If you just use a still image (picture), people just scroll past your ad. But if you use video, you grab their attention and cause them to at least slow down and notice your ad.
The video does not have to be a well produced commercial (like what’s on TV) or even like something on YouTube where you film yourself talking. In fact, it doesn’t even have to have sound. Most people will never hear the sound anyway. It just needs to be some sort of moving image- something mesmerizing to catch the eye.
So, the video (or moving image) will catch their attention but the ad copy and sales points will still be as written text…
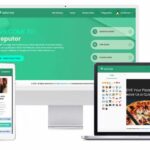
If you don’t want to film a video, no problem at all. There is an app you can download to your phone or use on a desktop called Boosted that generates videos especially for these kinds of ads. You customize the video with your own text and end up with something like this…
The Boosted app has pre-made video clips in a wide range of different industries. The cost is only like $12 or $13 a month and you can cancel after the first month (after you’ve downloaded your video or videos).
Post Your Video First
When your video is ready, first post it to your business’s Facebook page and Instagram account just like any other post. Make the text portion of it say what you will want to the ad to say (the ad copy). DO NOT create a new video ad inside the Facebook Ad Manager (using its ad creation tools). Just select your video post (using the post selection tool) when you do create your ads inside the Ad Manager. It will be cheaper that way. And so to achieve this, your video will need to be posted beforehand.
I would also let a few days go by before creating the ad campaign (just to make sure your post will be available to select).
Setting Up Your Campaigns
When setting up your campaigns, you should always separate your Facebook campaign from your Instagram campaign. So you will have two campaigns (one for Facebook and one for Instagram). Never mix them into one campaign. Facebook and Instagram ads are different. You’ll want to see the results from each separately. If you create one campaign that runs on both platforms, you won’t know what’s what when you look at the results.
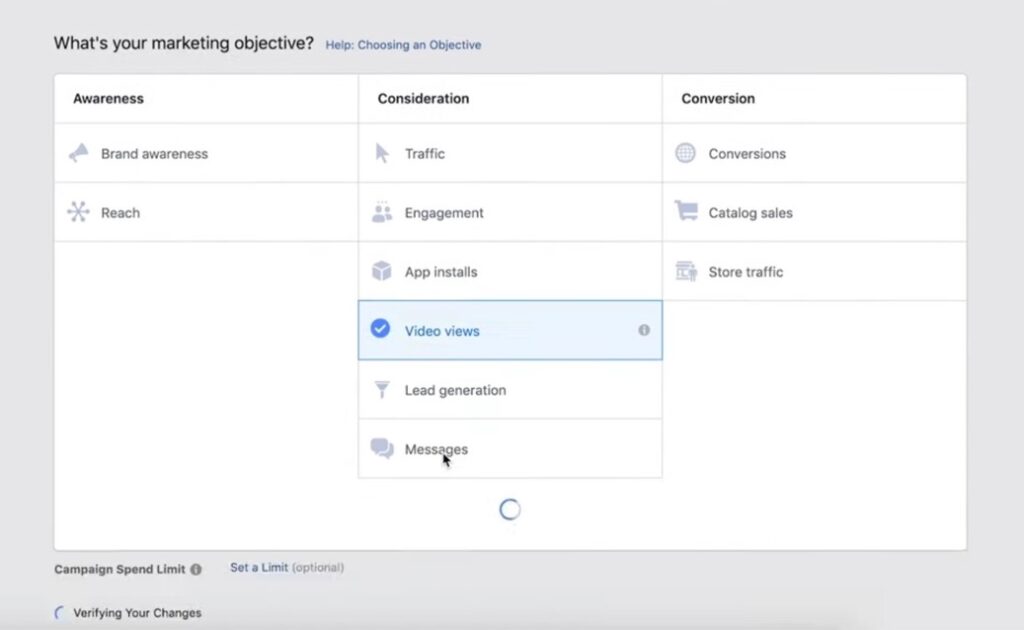
Let’s start with a Facebook campaign. When you begin creating a campaign, it will ask for your objective. Choose “Video Views”. This will be cheaper, give you more control, and will generate the awareness that you want…
After that’s selected, it will ask you to name your campaign. I would be sure to include the word “Facebook” somewhere in the campaign’s name (so you know that this is the Facebook one and not the Instagram one).
Next, it will ask you to name the Ad Set. The “Ad Set” is the same as an “Ad Group” in Google Ads. I usually just name it something to tell me the targeting methods I’ll use (which it may automatically do anyway).
Now you will enter all your targeting settings. First, you can skip the “Custom Audience” section. That gets into more involved technical things that you don’t need to worry about, starting out. Then select your local geographic location, the age range you want to target, genders, and enter English for language of course.
Then, in the “Detailed Targeting” section, type in the audience that you want to target. For example, if you’ve got a pizza shop, type in “pizza” and select any suggested audiences with an interest in pizza. And that is actually where Meta’s algorithm comes in handy. They actually have data on all their users and this is where it comes into play.
Next, you’ll arrive at the “Placements” section. It will automatically be set to “Automatic Placements”. And even though it says “Recommended” behind it, don’t buy that. It’s just a ploy to get you to overspend. Make sure you switch it over to “Edit Placements”…
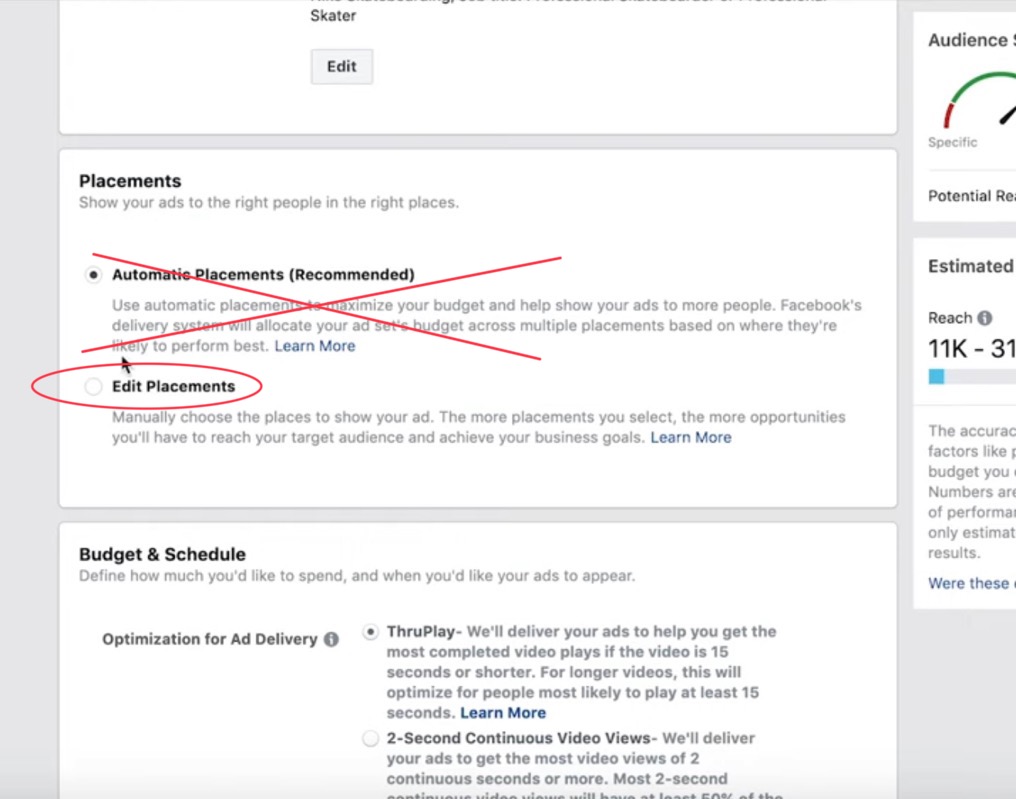
After you click on “Edit Placements”, it will open up a long list of placements. Uncheck everything except “Facebook News Feed”…
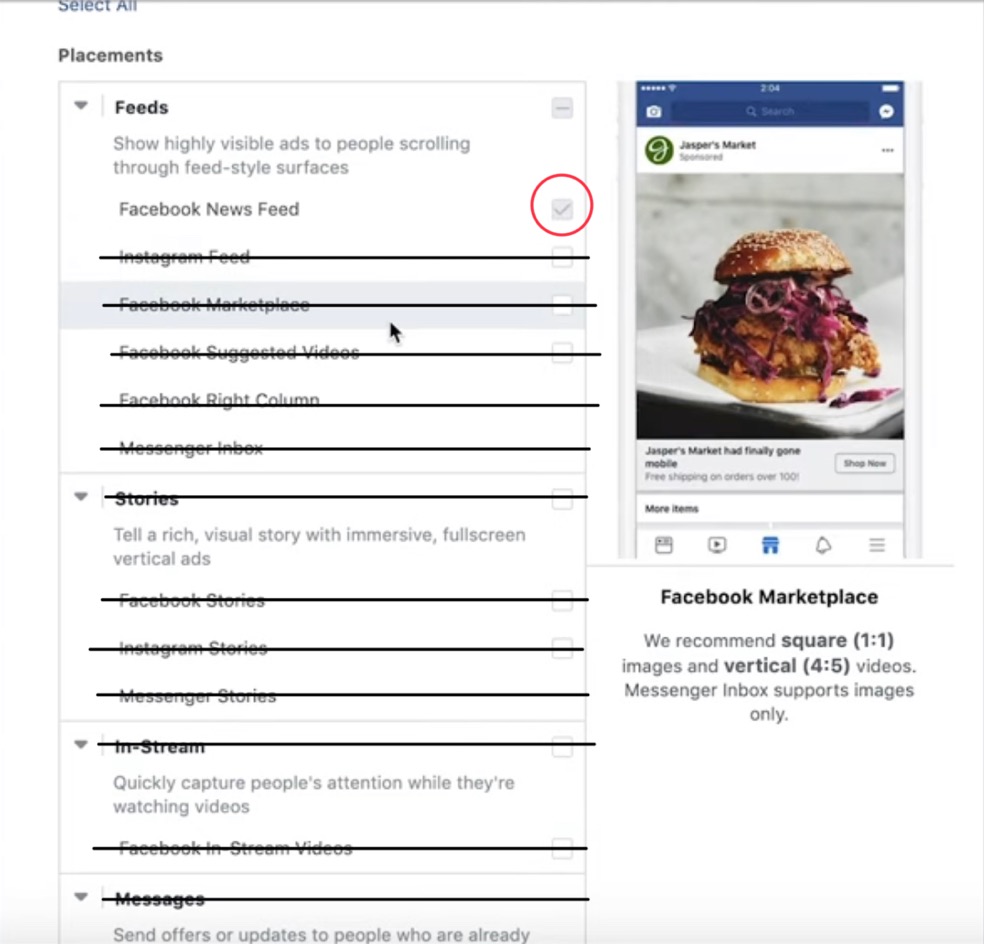
All of those other options like Marketplace, Suggested Videos, Stories, In Stream Videos, Apps, and any third party stuff is known to not perform well. It will all just waste your budget. So only “Facebook News Feed” will do just fine. Later on, when you’re setting up the Instagram campaign, uncheck everything except “Instagram Feed” (when you get to this part).
Next, you’ll arrive at the “Budget Schedule” section. It will first ask about “Optimization for Ad Delivery” and be set to “ThruPlay”. That’s fine. You can leave that setting.
Scrolling down from there, you’ll be at the “Cost Control” bit. You can cap the cost-per-view there to help control overspending.
Next, you’ll choose if you want to do “Daily Budget” or “Lifetime Budget”. Just like I’ve explained in the Google Ads and YouTube campaigns, I always choose “Daily Budget” because I can start, stop, delete, and recreate campaigns as I wish. And if a campaign is working, there’s no reason to ever stop (unless it’s just a temporary incentive or “SALE!” that I’m promoting).
The next section of settings you can leave alone (regarding ad schedule, etc.- unless you only want to advertise at night for some reason, for example) and we’re off to ad creation…
Like I explained earlier, we’re not going to create our ad here. We already posted it as a post. So what we’ll do here is switch it to “Use Existing Post”…
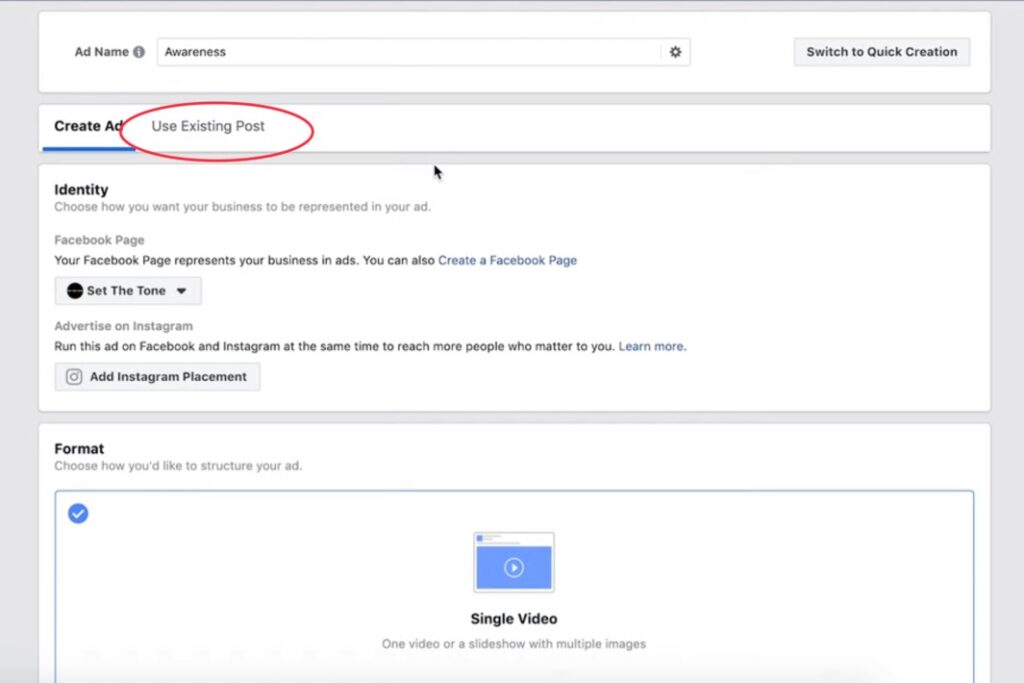
Then use the drop-down boxes to select your business’s Facebook page and then select the post (video). If you were setting up the Instagram campaign, obviously, choose your business’s Instagram account and then the Instagram post.
Now just put the finishing touches on the ad like a call-to-action and your website (but be aware that actual clicks to your website cost more than just the video views/general awareness).
That’s it! Now just let it fly! (And repeat for the Instagram version).
If you have a small business that wants to advertise nationwide (or even in multiple countries), such as an e-commerce site, I have a better way to advertise. That’s what my next lesson is on…