Setting Up Remarketing
Before advertising your business online, you should first set remarketing up. Remarketing (also known as retargeting) is a concept whereby potential customers visit your website, they are tracked, and then you can advertise to them again later on and remind them that your business still exists. I’m sure you’ve seen remarketing/retargeting in action. They’re those ads you see that follow you around the internet for months just because you visited a website once. That’s what we’re doing here! And the difference between remarketing and retargeting is only that Google coined the word “remarketing” while Facebook coined “retargeting”. But they’re the same thing.
Setting Up Remarketing in Google Ads
To set remarketing up in Google Ads, go to:
and sign into Google Ads with your Google account. Make sure you’re in expert mode (the normal dashboard screen) and not the watered-down, easy version that they like to force on you during onboarding. If you’re setting up your Google Ads account for the first time, find and click on “switch to expert mode” which you should find towards the bottom of the page after you type in your business name and website. Then, if it automatically tries to create your first campaign, just “skip” (we’re not setting up a campaign just yet). All we want to do right now is set up remarketing so we can start tracking our website visitors and then re-market to them later.
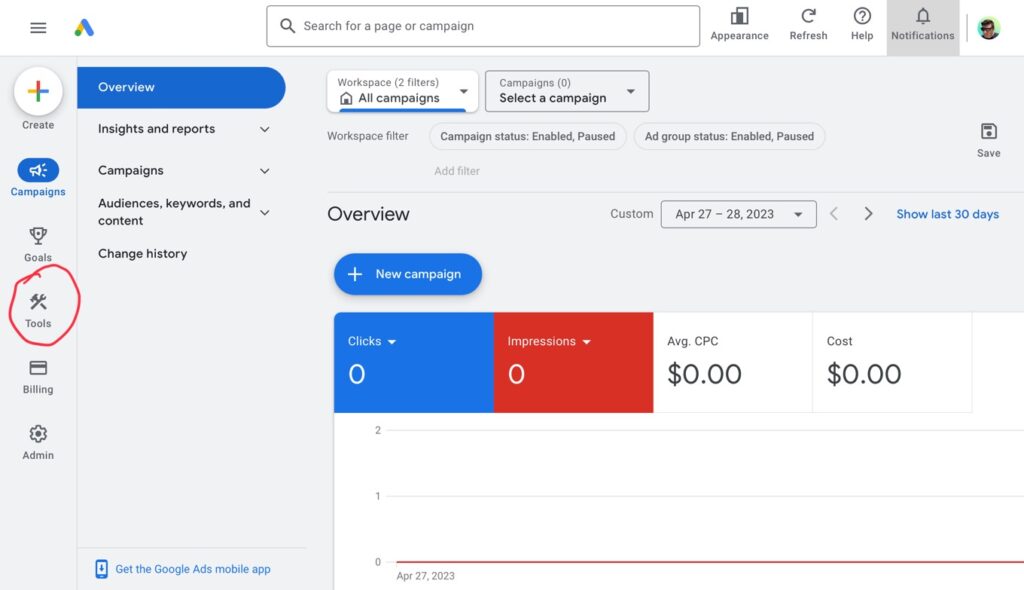
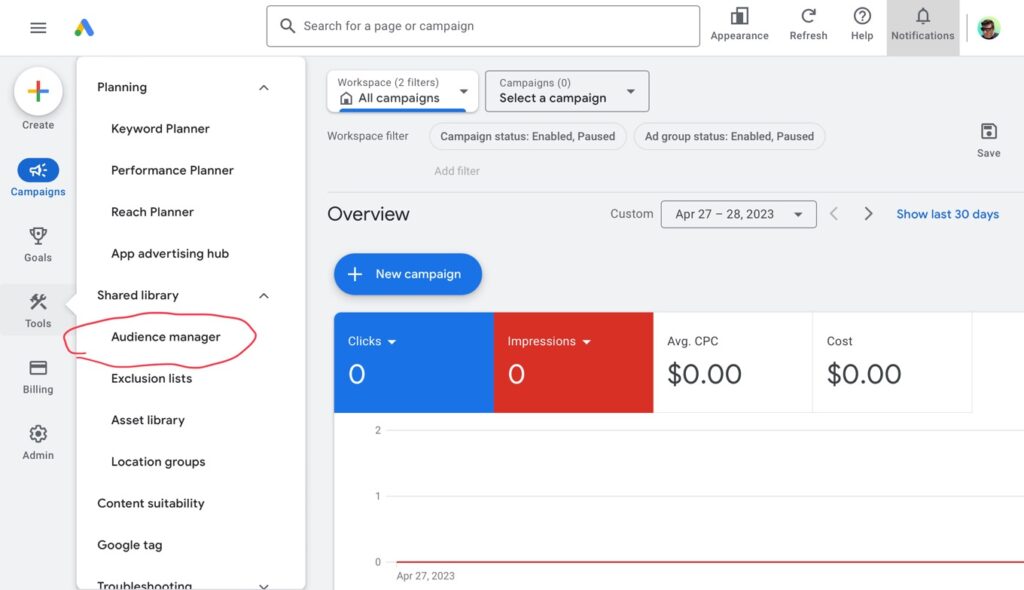
Once you’re in the normal/expert dashboard, click on “Tools”…
Then click on “Audience manager”…
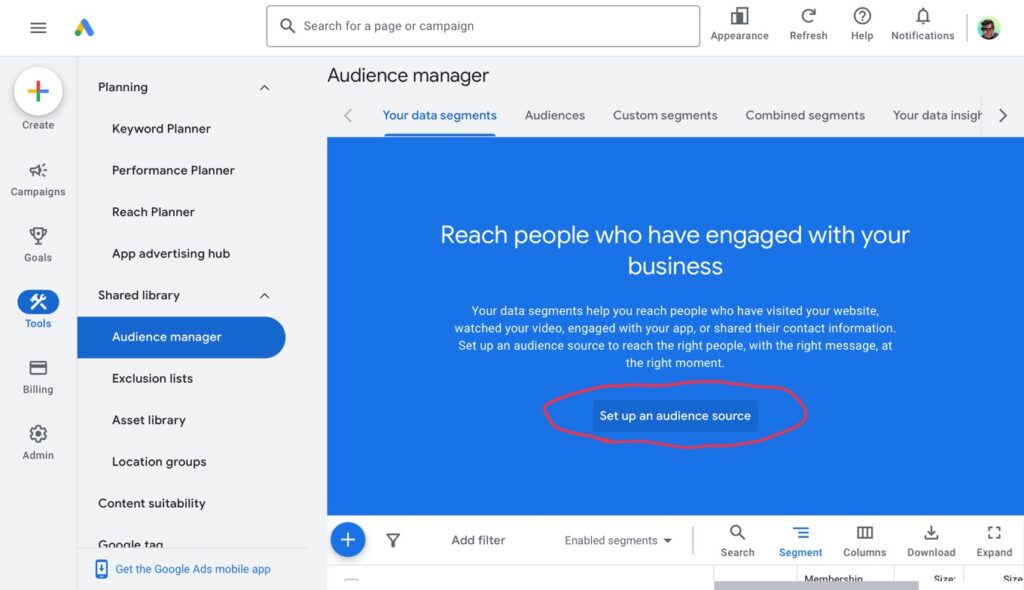
Now we need to set up an audience source so click on the “Set up an audience source” button…
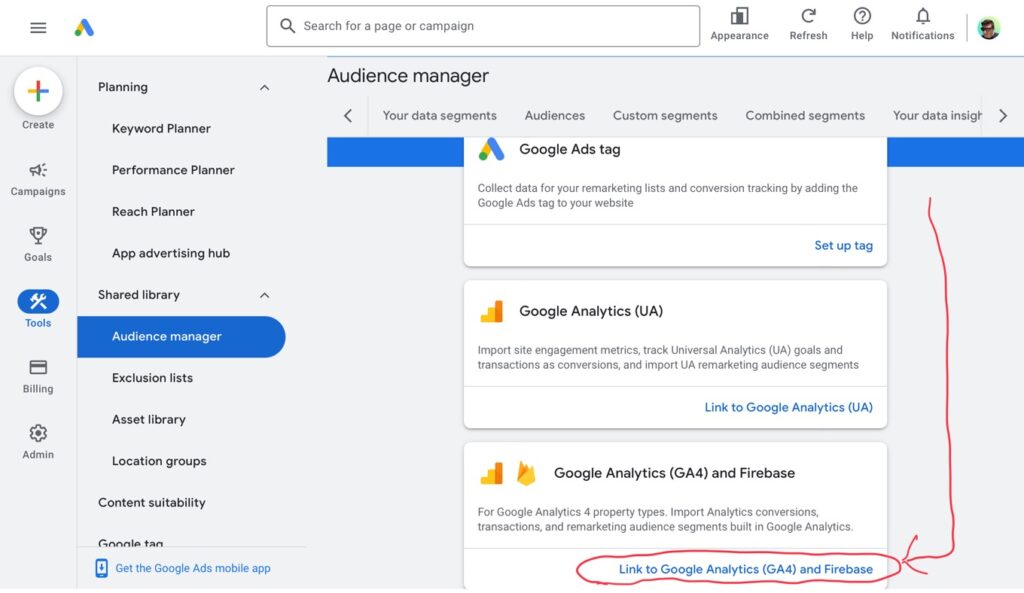
Since I’ve already set my website up with Google Analytics (and so should you have if you’ve been following my lessons), I’m going to scroll down and choose “Link to Google Analytics (GA4)”…
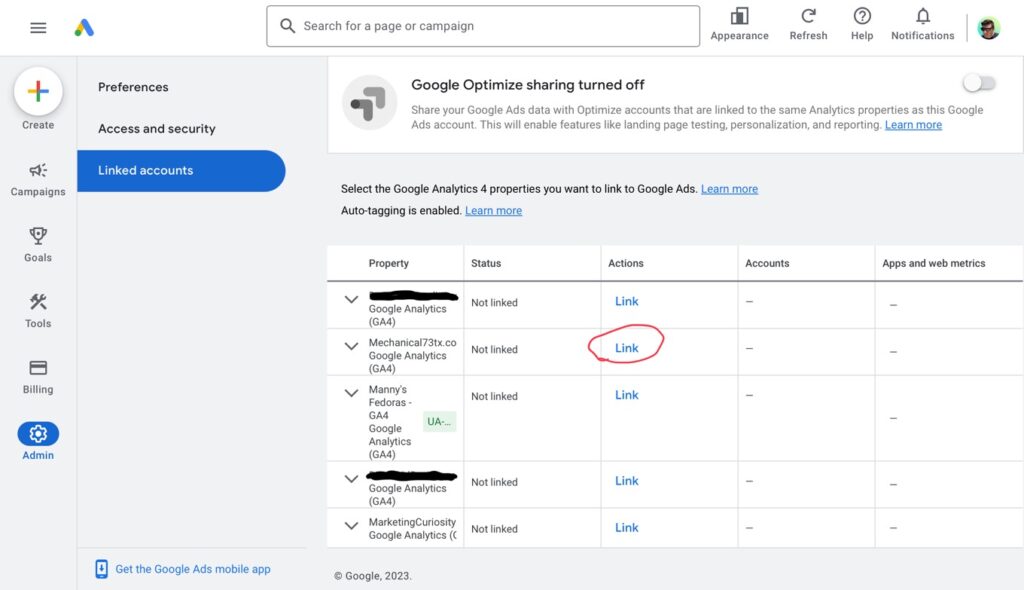
Find your website in the property list and click “Link”…
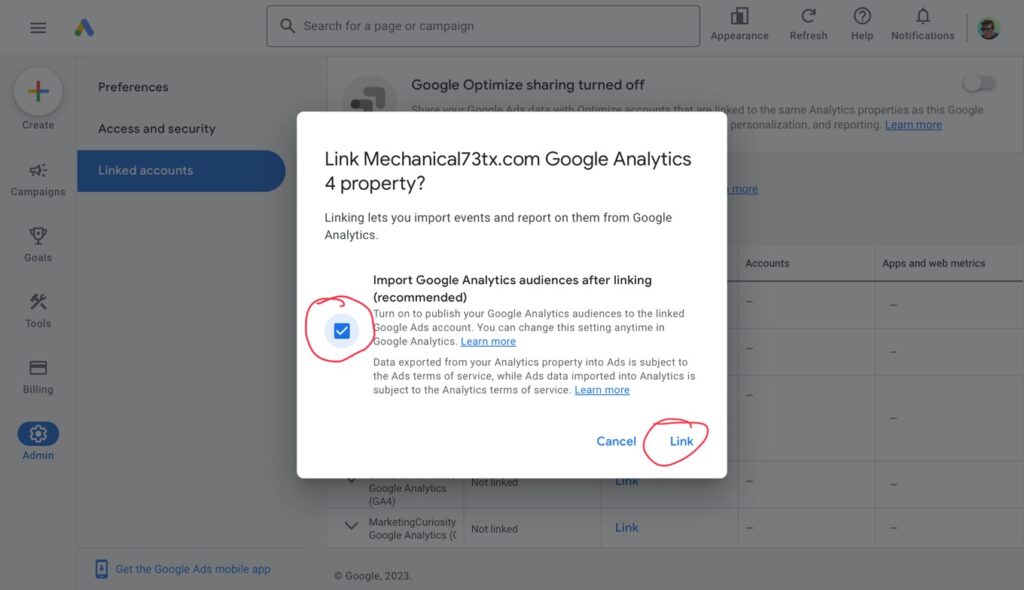
Then you’ll see a popup. You might as well check the box because it will import any visitors that Google already knows about into your Google Ads account. Click “Link”…
You will know it’s connected properly when you see this…
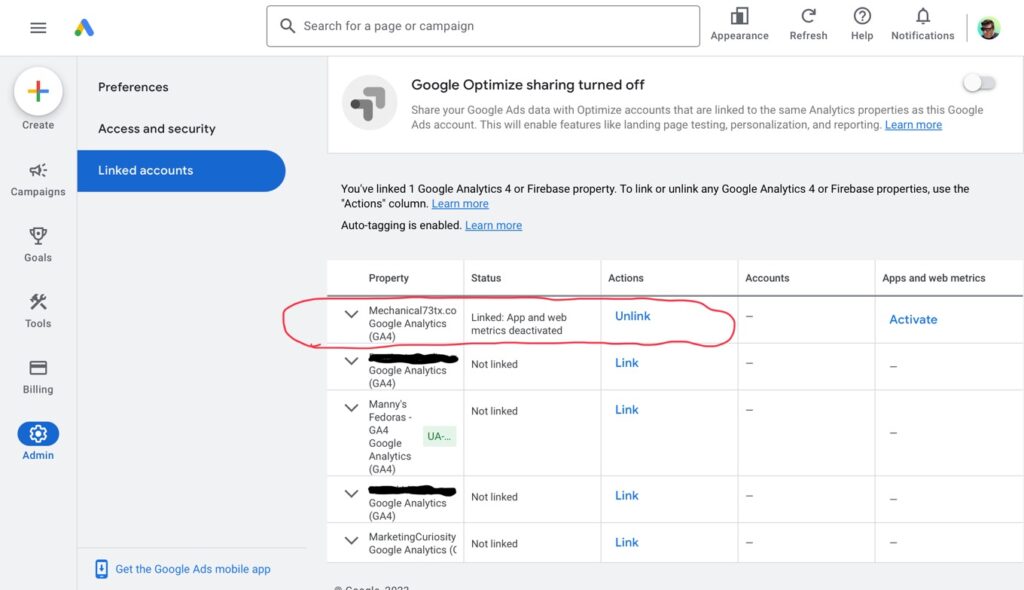
Now, it will take time for the list of users to populate. Once your audience list reaches at least 1,000 users, you can use the audience to show ads to.
Setting Up Retargeting in Facebook Business Manager
While you’re at it, you might as well set up the Facebook version of remarketing (called retargeting). By advertising with Facebook Ad Manager you can also reach your visitors again on Instagram as well as Facebook (as Meta owns both). You just would first have to set your business up with Facebook Business Manager so that you can get their tracking code (called The Facebook “Pixel”). To do that, first create a Facebook Business page for your business and/or an Instagram account for your business (if you don’t already have them). Share them, make some posts, and get some followers. Then create your Facebook Business Manager account by logging in at:
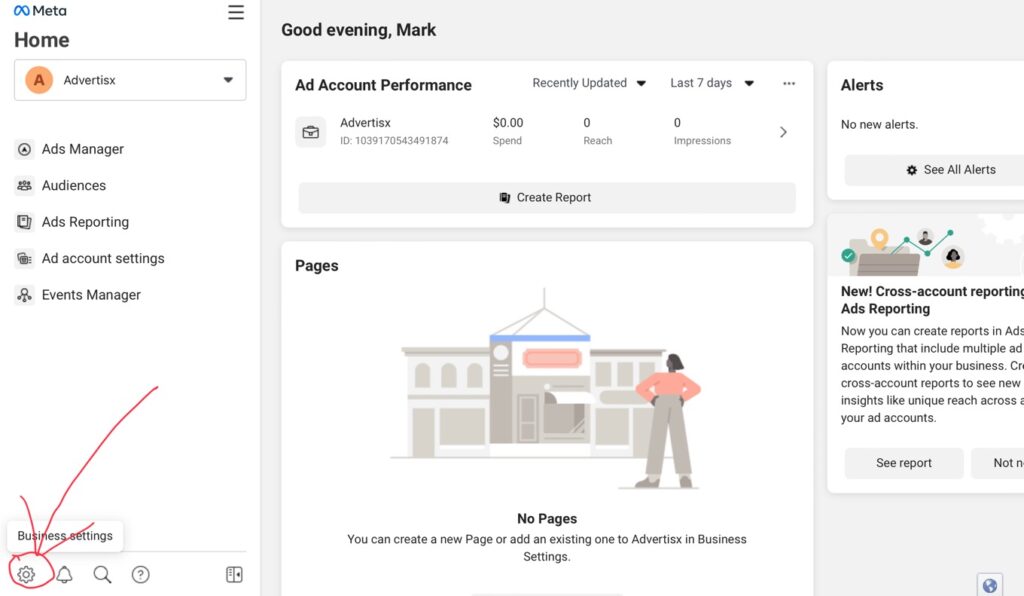
with your personal Facebook account (although do so on a desktop). Then connect your Facebook page and Instagram account to your Business Manager account by adding them. To add them, click on the “Business Settings” wheel icon inside your Business Manager account…
Now, underneath the “Accounts” heading on the left column, you can add your business’s Facebook page by clicking on “Pages” and add your business’s Instagram account by clicking on “Instagram accounts”…
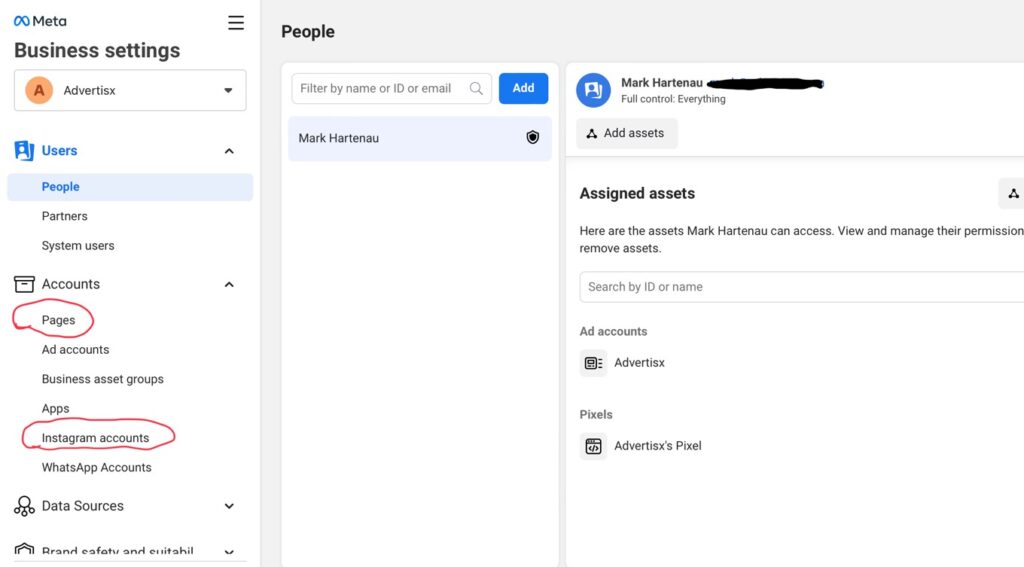
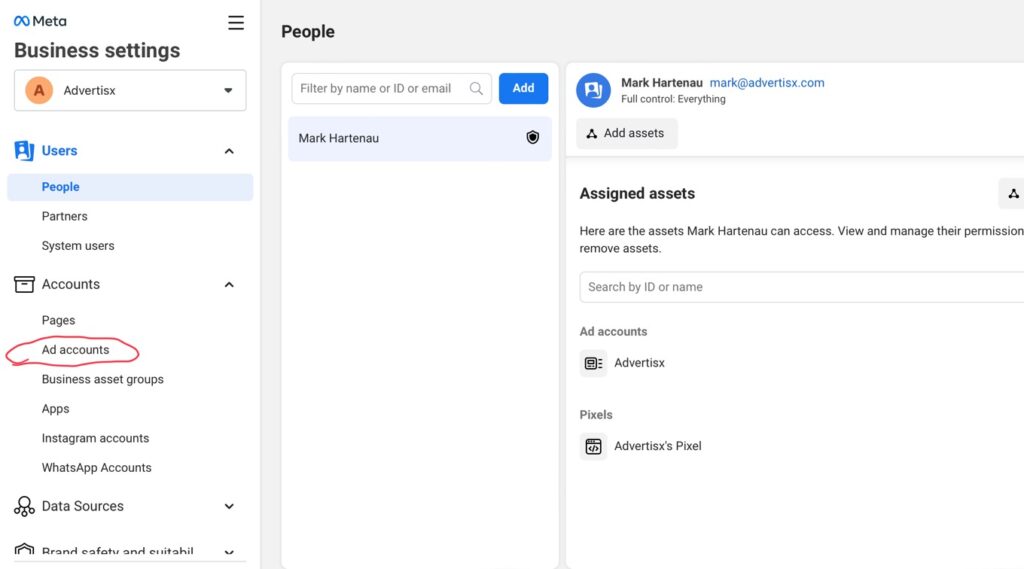
Next, click on “Ad accounts” (also in the “Accounts” heading) and make sure you have an ad account created and added…
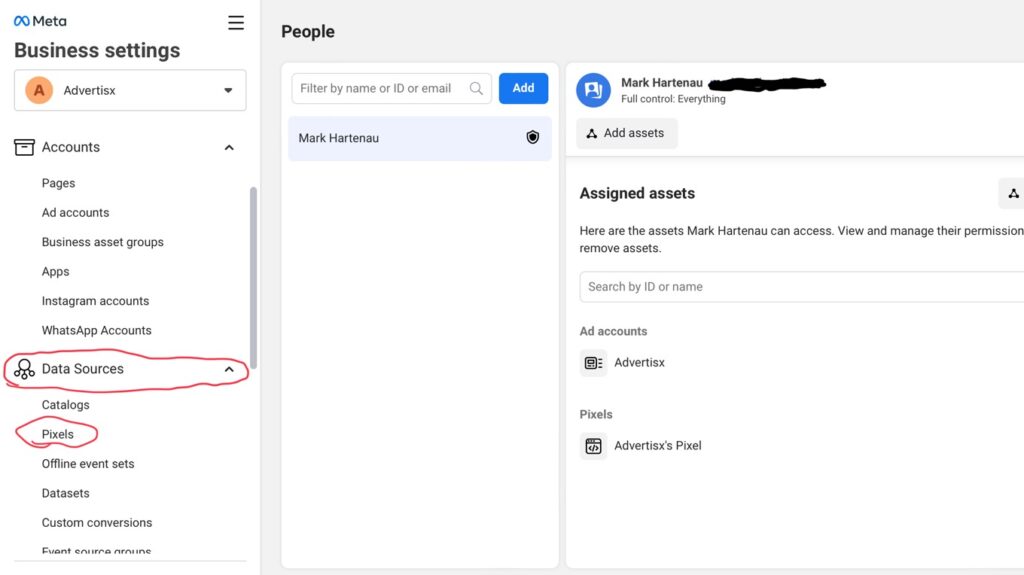
Once all that is done, you can get your pixel by clicking on the “Data Sources” heading and then clicking on “Pixels”…
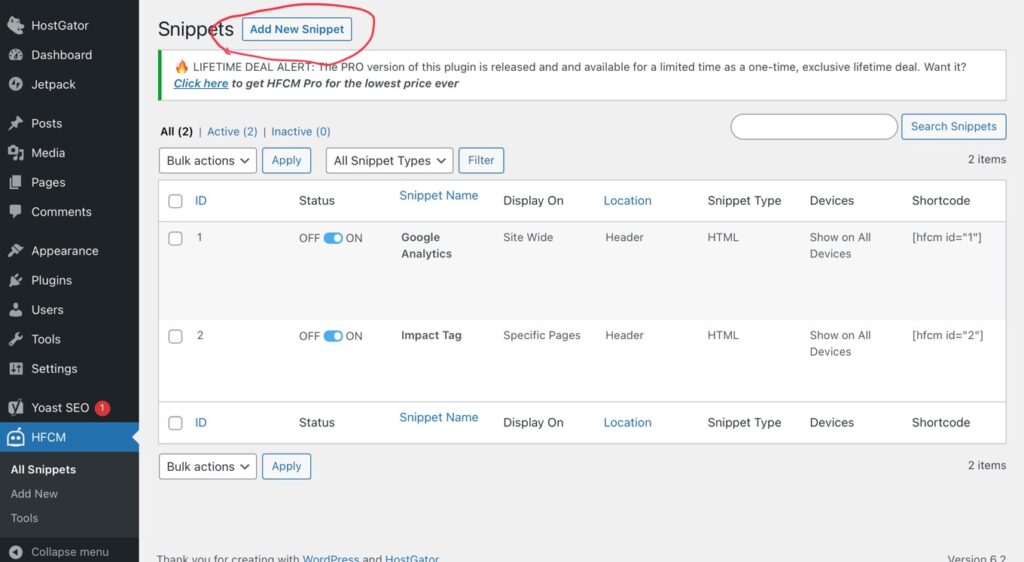
Inside “Pixels”, create and copy your pixel/code (unfortunately, I can’t show you exactly how without creating a new business). But once you have that code, paste it into the head section of all of your website’s pages. In WordPress, you can do that by first installing the Head Footer Code Manager plugin by 99robots (as I’ve covered in previous lessons). Then create a new snippet, title it something like “Facebook Pixel” (so you can differentiate from other snippets), keep it set to “Site Wide”, and paste the code/pixel…
Meta will now be tracking users who visit your website so that you can show ads to them again later when they’re on Facebook and/or Instagram!
Next, it’s time to start sending traffic to your site. We’ll do that by running ads to your local business in my next lesson…