Connecting Your Domain to Your Web Hosting
(and other technical tasks prior to building your website)
How to Connect Your Domain Name to Your Web Hosting
After you sign up with a hosting company, they should give you your name servers. There are always two name servers and they look something like this:
Name Server 1: nsXXXX@namecheap.com
Name Server 2: nsXXXX@namecheap.com
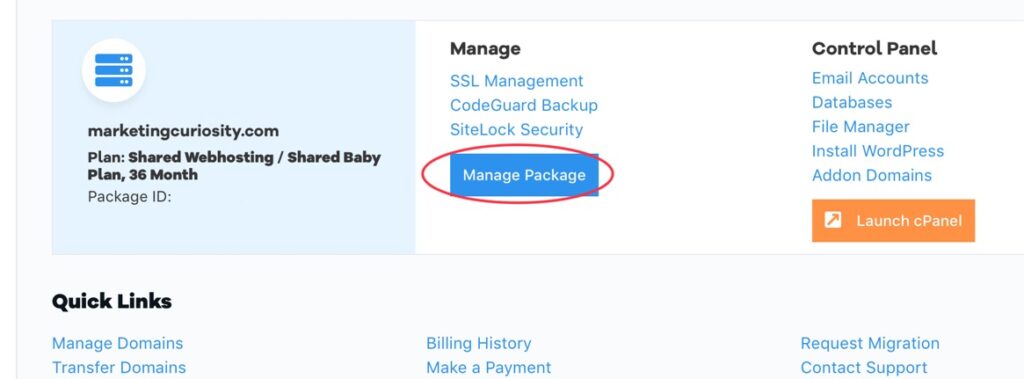
If you bought a bundled hosting package from NameCheap in particular (both the domain name and hosting) you won’t have to do anything. They should automatically be connected. If your domain name and web hosting are two separate companies, your hosting company should email you details about your web space, and in that email, you should find your name servers. If you lost the email, you can simply login to your account at your hosting company and navigate to where your name servers might be. It may be somewhere where you manage your package, like this…
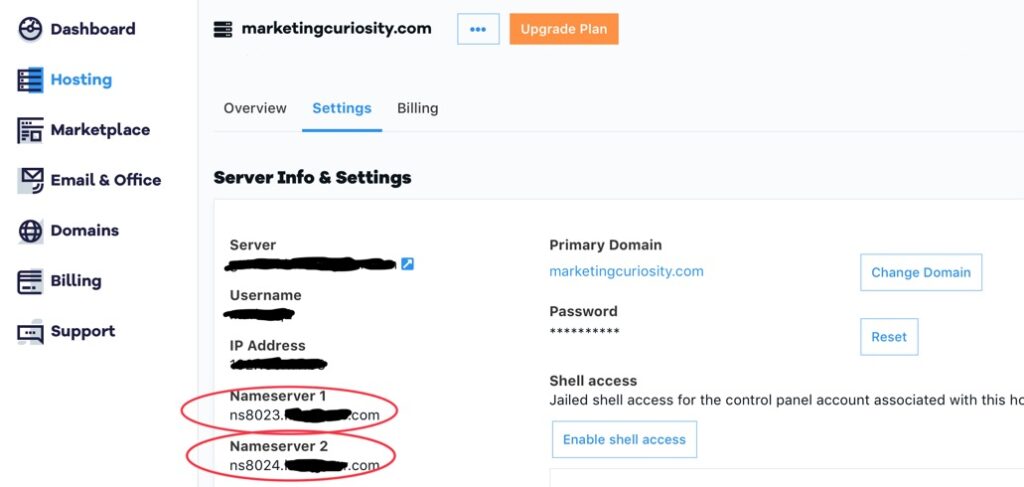
Then you might have to navigate to “Settings” or anywhere where there is additional information and find the two sets of name servers…
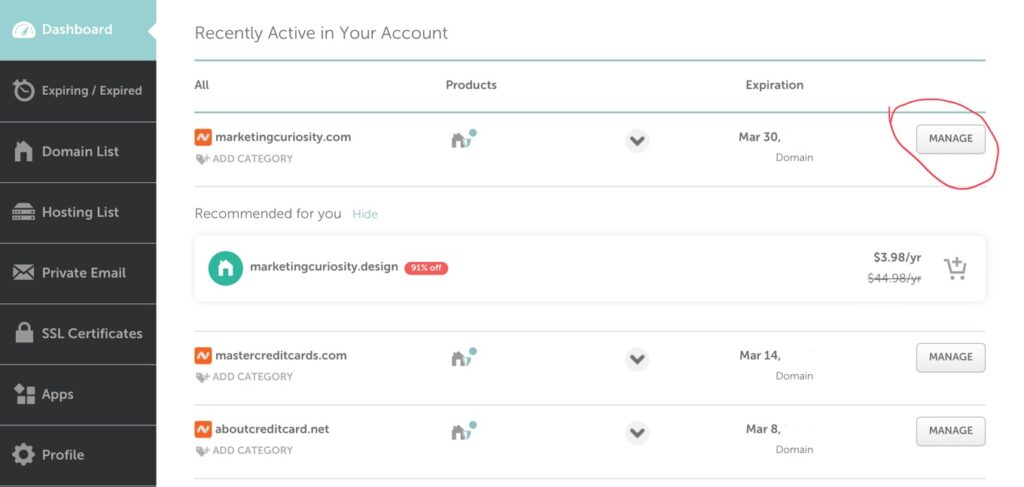
Now that you know where your name servers are, simply head over to your registrar (in another tab) and find where you edit changes to your domain name’s settings. In NameCheap, you go to your “Dashboard” (or “Domain List”) and click on the “Manage Button” next to your domain…
Details regarding your domain name will now appear. Go down to the “NAMESERVERS” section and switch the drop-down menu to “Custom DNS”. Now enter the name servers (or copy and paste them one by one)…
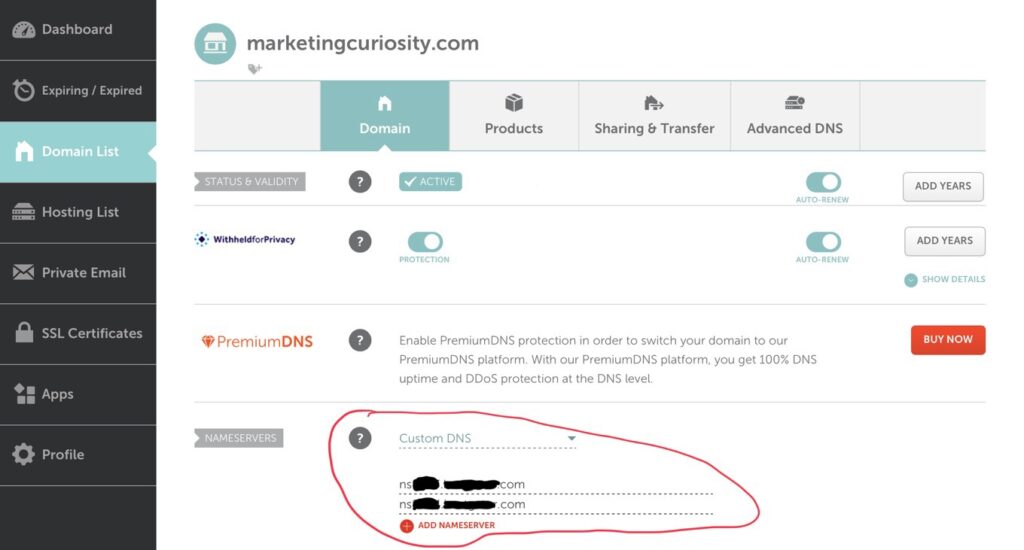
There should also be a green checkmark. Click on it after entering the name servers to make sure they are saved. Now wait 24-48 hours for the connection to take place.
Using Free SSL
If you have a hosting company like NameCheap that provides free SSL, we don’t have to purchase it from our domain registrar. Lucky us! However, since every NameCheap website automatically has SSL, there is a small issue we have to fix. And that is: there are actually two websites in Google’s eye (the “http” version and the “https’ version). To Google, they seem like two different websites that are exact copies of each other (even though there is only one). And Google doesn’t like seeing that. They will likely not rank your supposed two websites very high in search results when they see that. And since Google prefers the https version, what we have to do is get rid of the http version by redirecting it to the https version.
Here is how you do that:
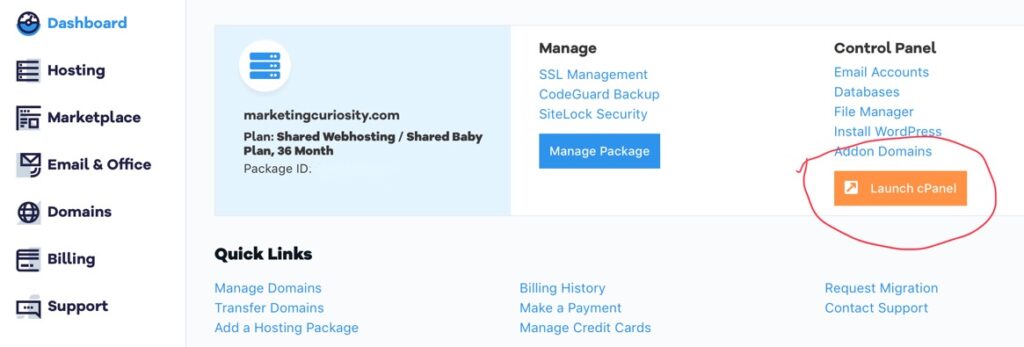
Go back to NameCheap (or your hosting company) and launch cPanel.
What is cPanel?
“cPanel” is short for “Control Panel”. It’s industry standard software used by most hosting companies. It’s your online control panel where you can control anything technical about your webspace. It’s where you access the files that make up your website, where you create company email addresses, and many other things like setting up domain names. So again, inside your hosting company, go to your hosting package and click on the “Launch cPanel” button…
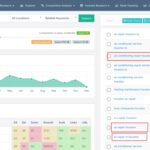
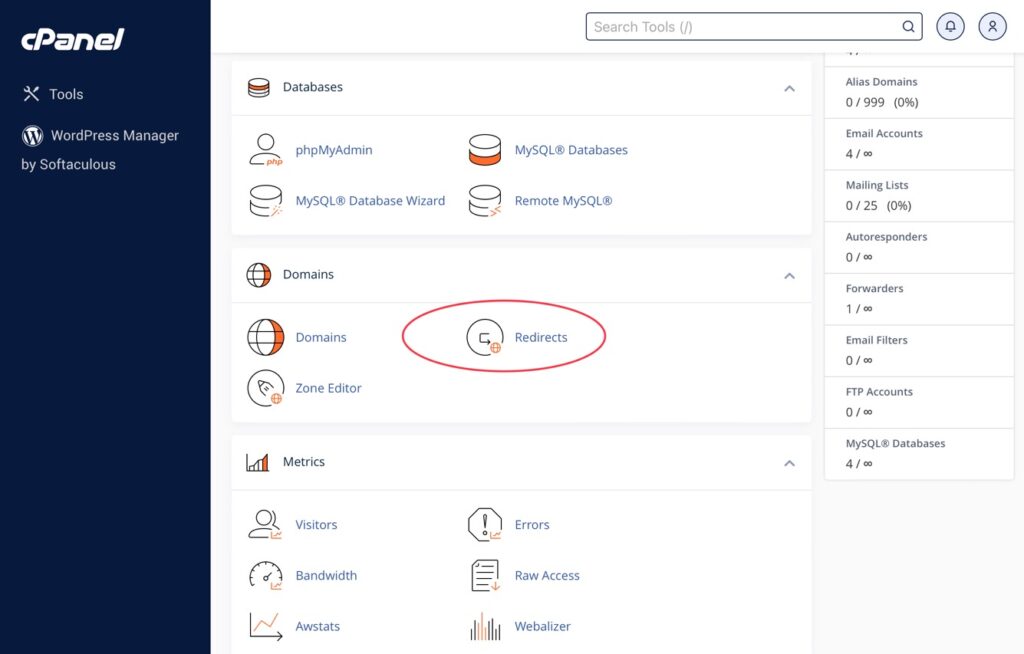
Then go to the “Domains” section and click on “Redirects”…
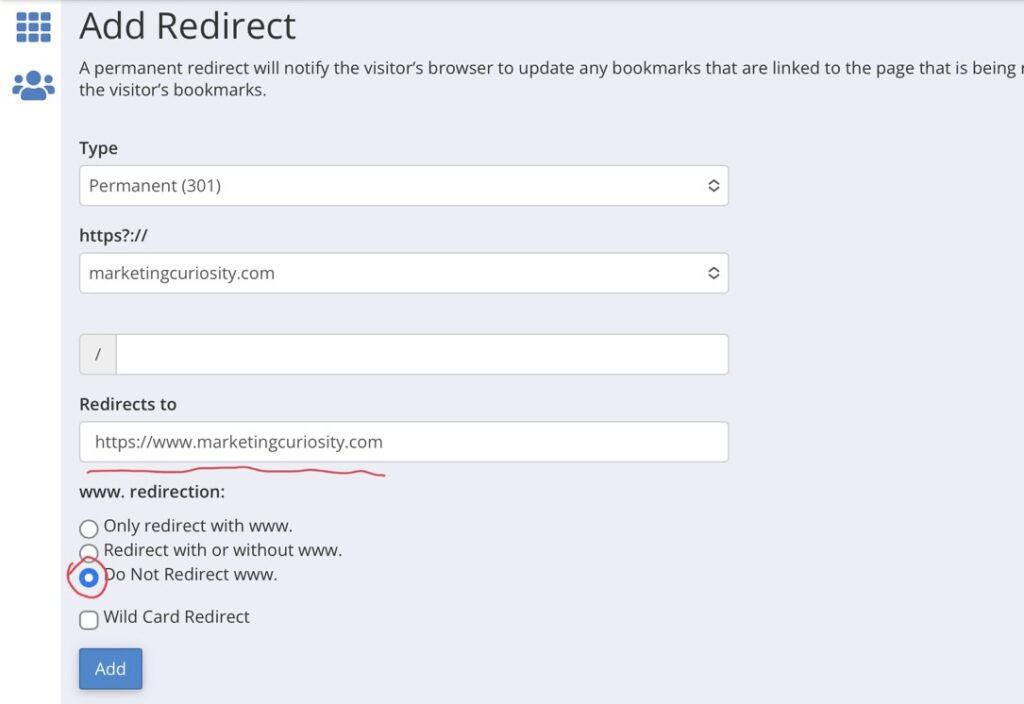
Now, leave the first drop-down menu on “Permanent (301)”. In the second drop-down menu, select your domain name (note that it is without “http” or “www” etc). Now, in the “Redirects to” field, type in the full domain with all parts included. Makes sure to include the “https”, the “://“, the “www”, and the “.com”. So it’s: “https://www.yourcompany.com”. Next, under “www. redirection”, select “Do Not Redirect www”. This way, no matter how people type your domain into their browser, they will always be redirected to one, single version (the correct version). If you choose either of the other two options, you could have an endless loop and your site won’t work. Now just click “Add”…
Setting Up Email Accounts
If you want to have one of those fancy yourname@yourcompany.com email addresses or set them up for your employees, you set those up in cPanel as well. If you plan on having a contact form on your site (you know, those forms where website visitors fill out their name and contact info when they want to contact you) you will need to create at least one email address for that (or the form can’t send the information to you). And I highly recommend that you use a contact form rather than showing your personal email address on your site because it would open you up to a world of spam. So anyway, that email address can simply be: admin@yourcompany.com or something like that. So in cPanel, go to the “Email” section and click on “Email Accounts”…
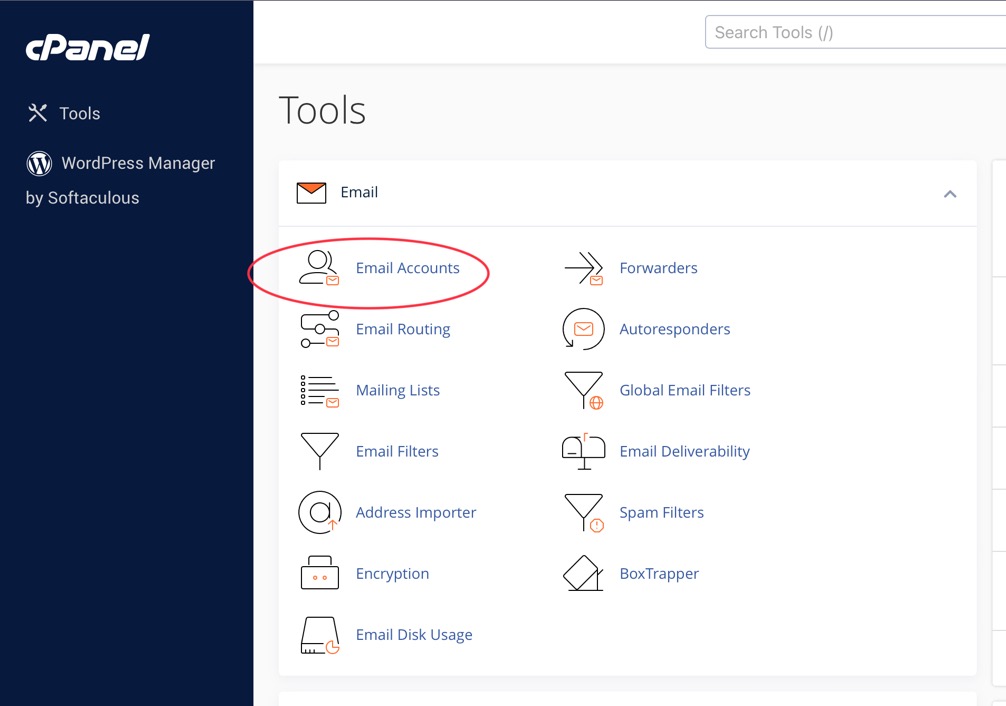
When the next page opens, click on the “Create” button towards the right side of the screen…
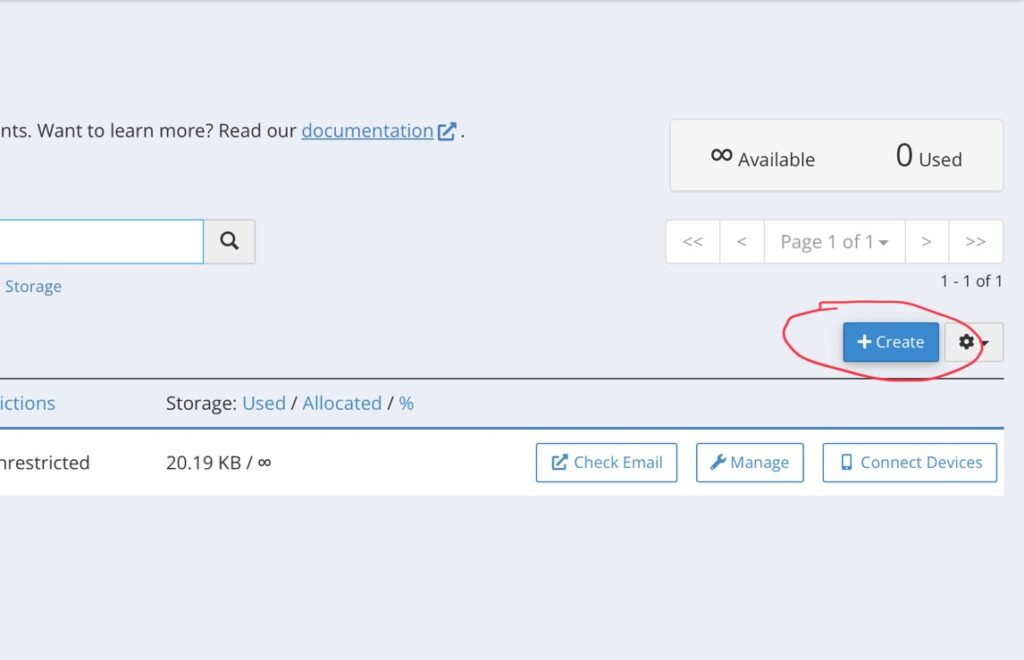
Now, make sure the drop-down menu is set the domain of the website you’re working on (it will be automatic if you only have the one). Next, enter the name that you want to put in fron of the “@“ symbol. If you don’t want to use any names and just want a generic company email address, you can use something like “admin@yourcompany.com”, “contact@yourcompany.com”, or “info@yourcomany.com” etc. Next, enter in a password that you’d like to use or use the auto-generate button. And finally, click the “Create” button.

Adding Additional Websites to Your Hosting Package
If you bought a hosting plan (like NameCheap’s plans) that allow you to have multiple or unlimited websites, you can add additional websites at no extra cost. Each additional site will technically be an “add-on” site (a sub-site underneath your main one) but Google and the other search engines see them all as individual sites.
Here is how you add additional sites:
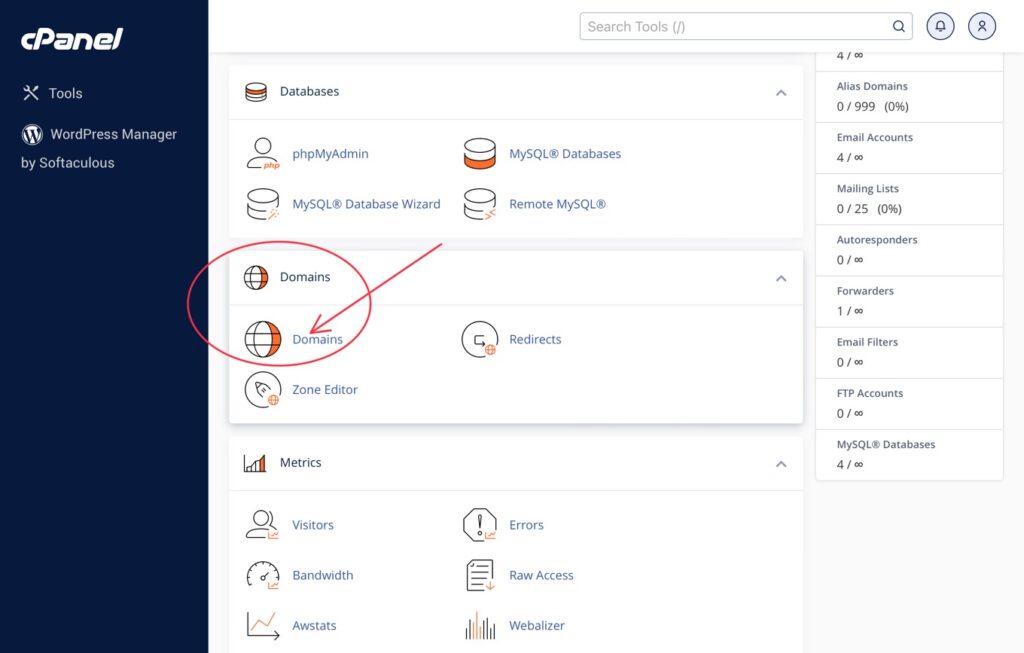
First, make sure you’ve connected the additional domain name via the name server connection that I covered at the beginning of this lesson. Next, go to the “Domains” section of cPanel and click on “Domains”…
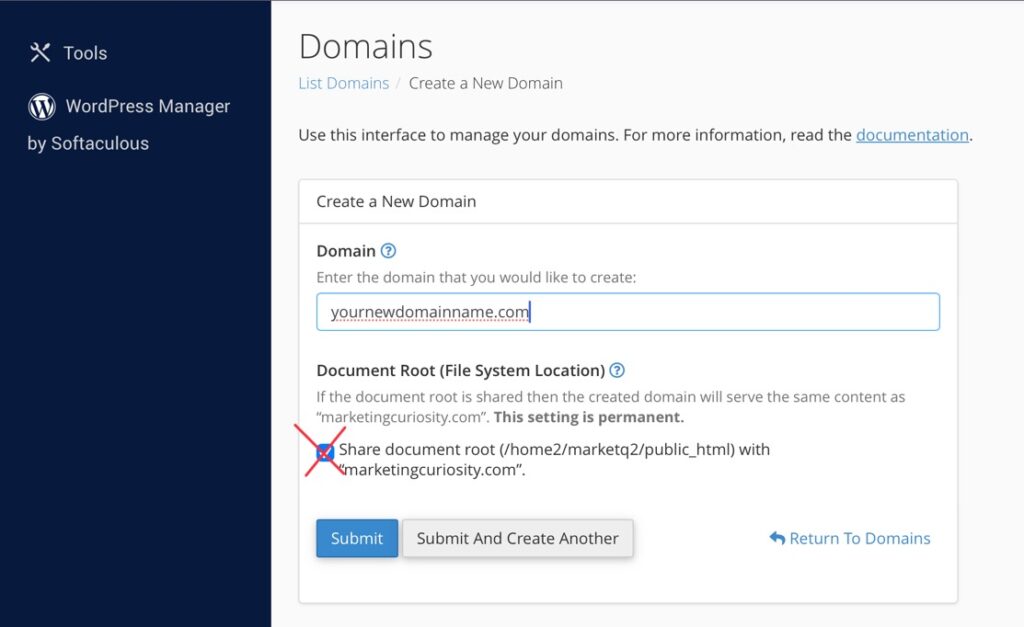
Next, a list of your domain names will come up (if you’ve previously created any which of course you will not have at this point). Just click on the “Create a New Domain” button…
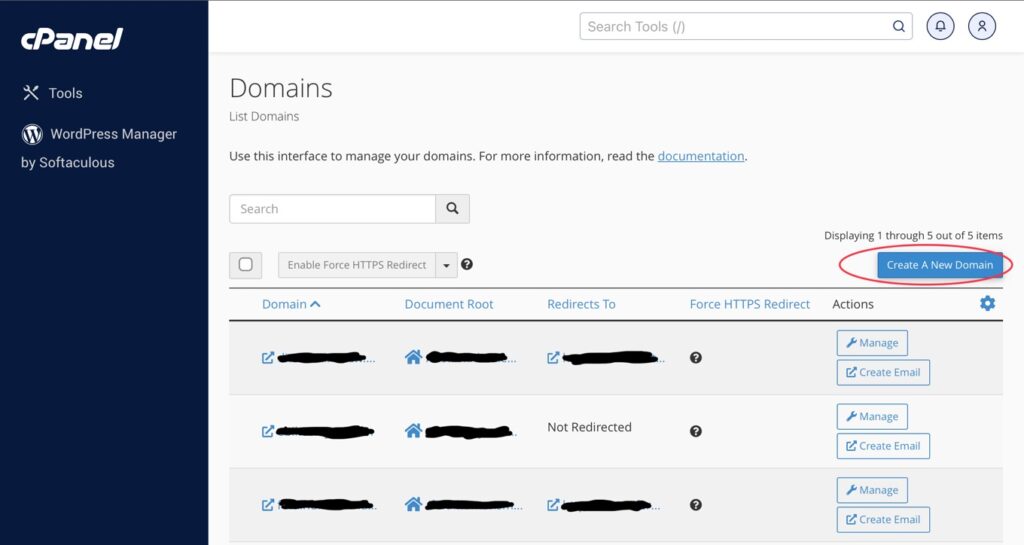
On the next page, type the additional domain under “Enter the domain that you would like to create:” (without the “https://www” but do use the “.com” or whatever extension).
Then make sure that you uncheck the checkmark. If you leave it checked, it will redirect the domain the main domain on the hosting account. That is not what you want. In this case, we’re adding a domain so it ends up being a separate website. So uncheck the checkmark…
You will now see all of this…
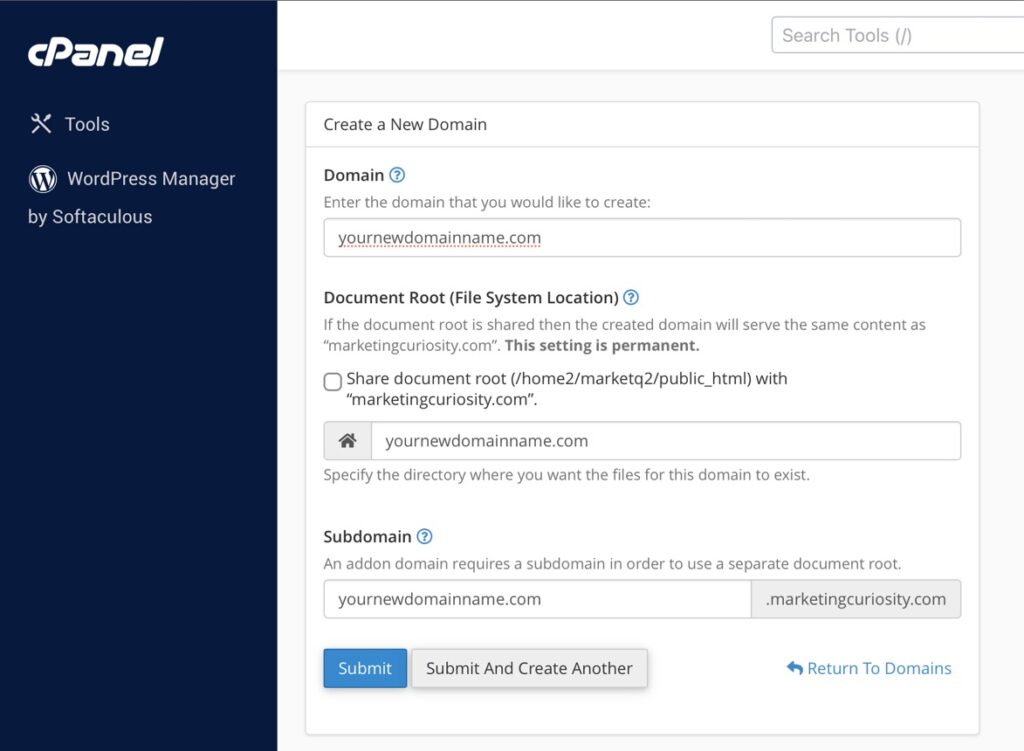
Go ahead and click “Submit”. Your new domain will now appear in that list of created domains.
You are now ready to begin building your website (or websites)!