Off-Page SEO
The first task in SEO undertakings that you can do off-page is letting Google know that you website exists and is ready to receive traffic. You can do that by setting up your site up with Google Search Console (a free tool that Google provides). You can also use it to monitor all the search traffic that comes to your site through Google searches. So it’s a great tool!
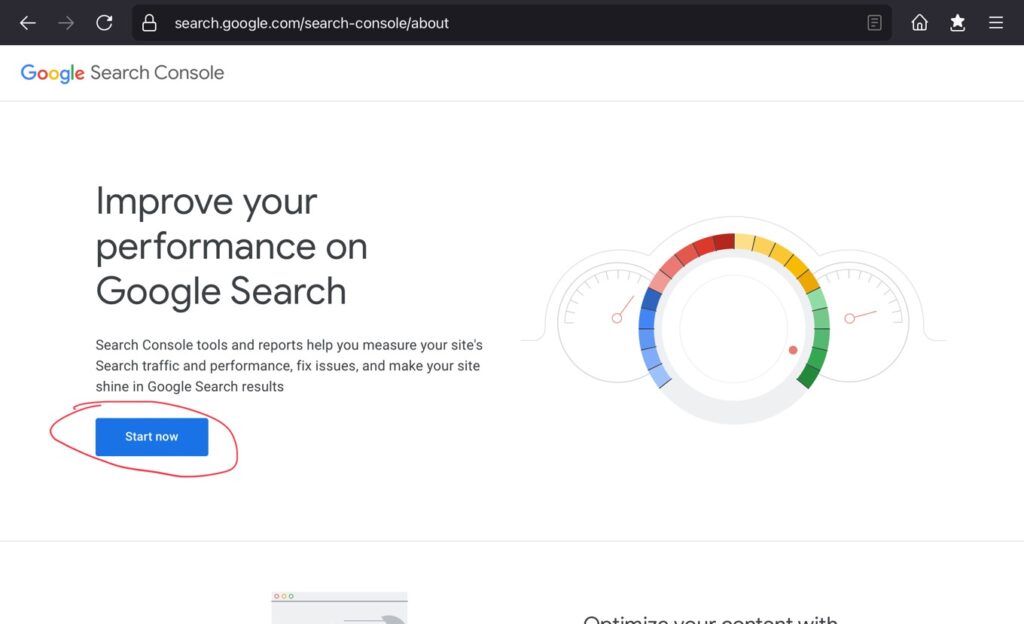
To start, go to:
https://search.google.com/search-console
Since you’re setting up your site for the first time and likely have no other sites set up on Search Console, click the “Start Now” button…
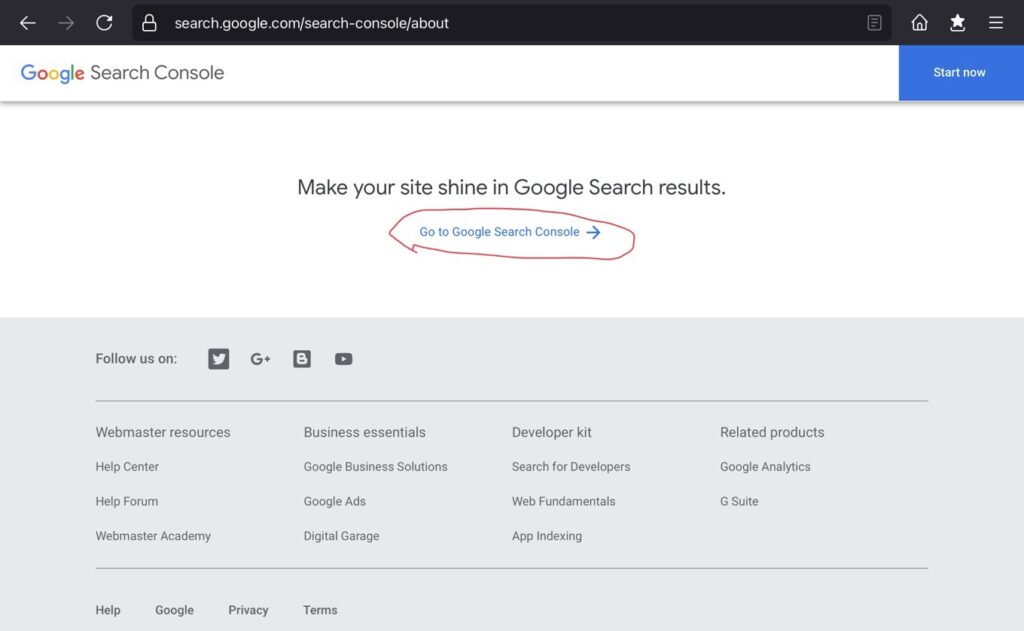
In the future, after your site is set up, and you come back to Search Console to monitor activity, scroll all the way down to the bottom of the page and click on “Go to Google Search Console”…
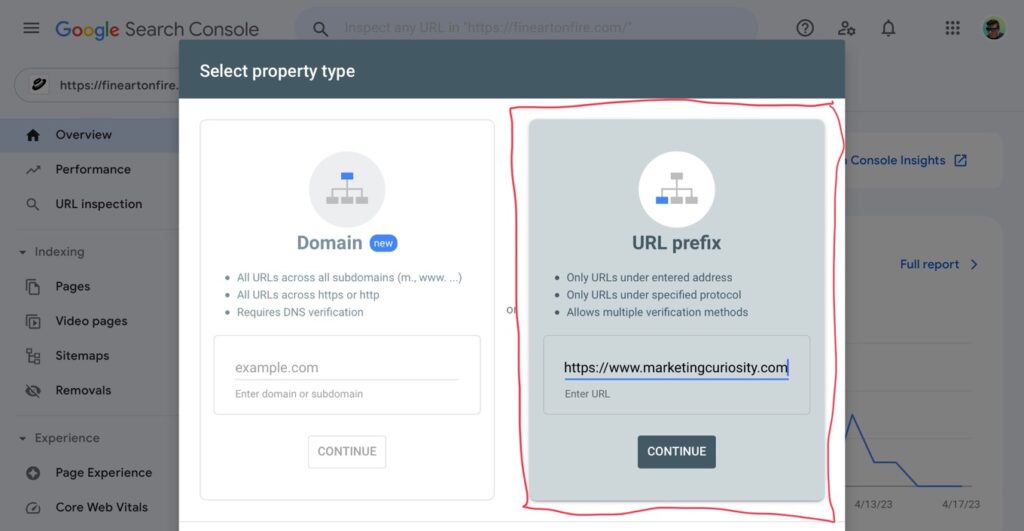
Either way you get there, go ahead and sign in with your Google account. Next, add your property (your website). I always use the right side, the “URL Prefix” option. Type in your web address completely (including the “https://www.” and the “.com”) and click on “CONTINUE”…
Now, your website should be automatically verified because you had already set it up with Google Analytics. If you haven’t, I’d go back to my lesson on setting up Google Analytics first. But if you’re all set now, go ahead and continue. Click on “GO TO PROPERTY”…

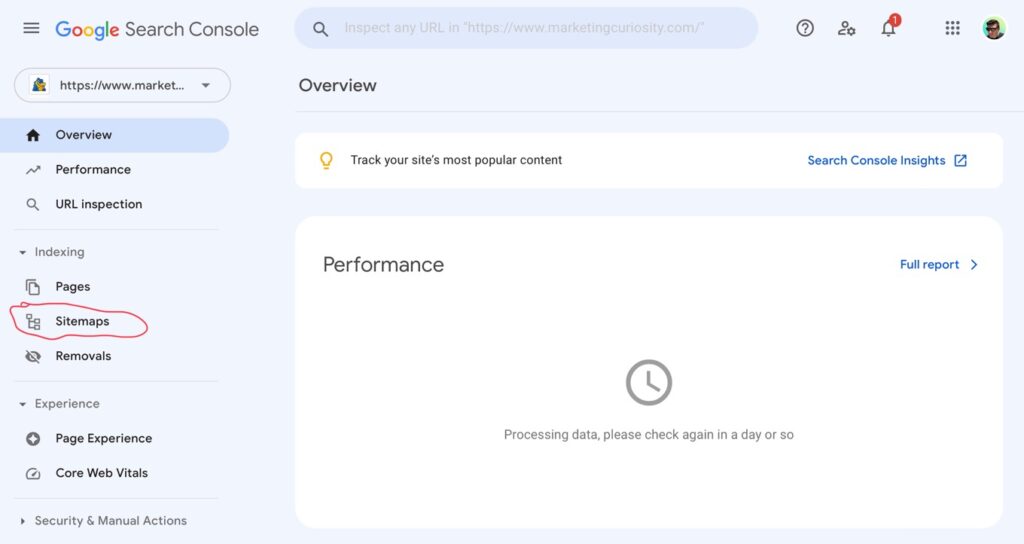
Next, we’ll submit a “sitemap”. A sitemap is basically a map of your website. Google’s algorithm uses it to quickly ascertain what’s all on your website and how it’s laid out. So click on “Sitemaps” on the left column…
If you’ve been following my lessons and built your website with WordPress hosted by NameCheap, then you’ve been using the Yoast SEO plugin automatically. Well, Yoast SEO created your sitemap for you as you were building your site. To find your sitemap, open up another tab and go to:
https://www.yourwebsite.com/sitemap_index.xml
If you see this…
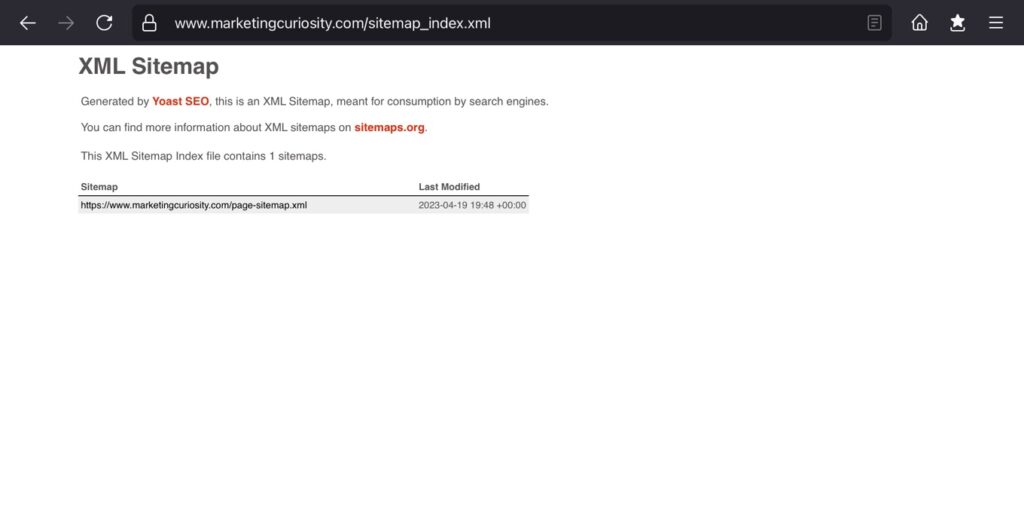
…you have your sitemap. Now go back to the Search Console tab and add it to the “Sitemaps” section. Right next to your URL, type the finishing part: “sitemap_index.xml” and click “SUBMIT”…
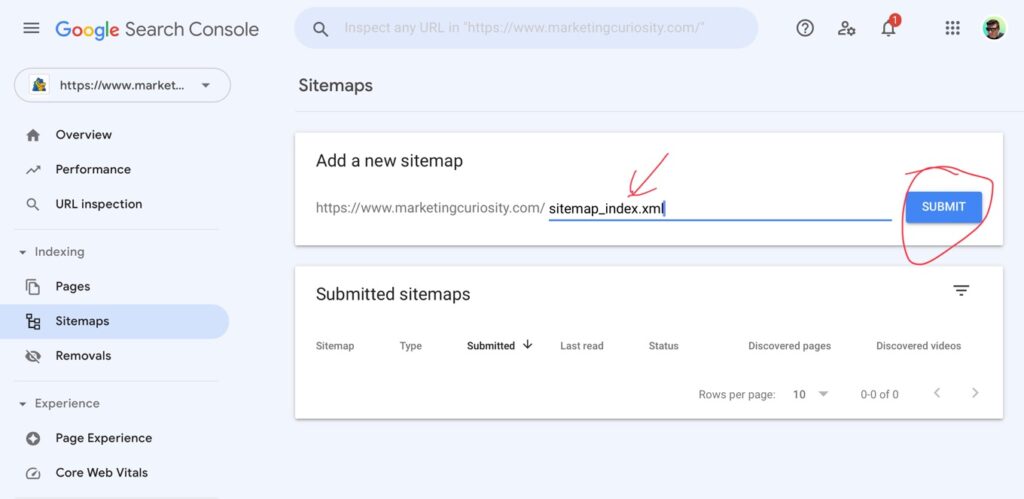
A pop-up will say, “Sitemap submitted successfully” and you’re done!
Including Microsoft
Next, we’ll do the same thing with Microsoft’s Bing. Even though Google gets 80-90% of the internet’s search traffic, why not reach the other 10-20%? Plus, other search engines like Yahoo and DuckDuckGo get their data from Bing. So by including Bing and their network (plus Google and their network) you can get found no matter what search engine is used! Plus, with all your competition focused on Google, it’s easier to rank well in the other search engines (providing opportunities for easy sales).
So to get set up on Bing, go to:
https://www.bing.com/webmasters
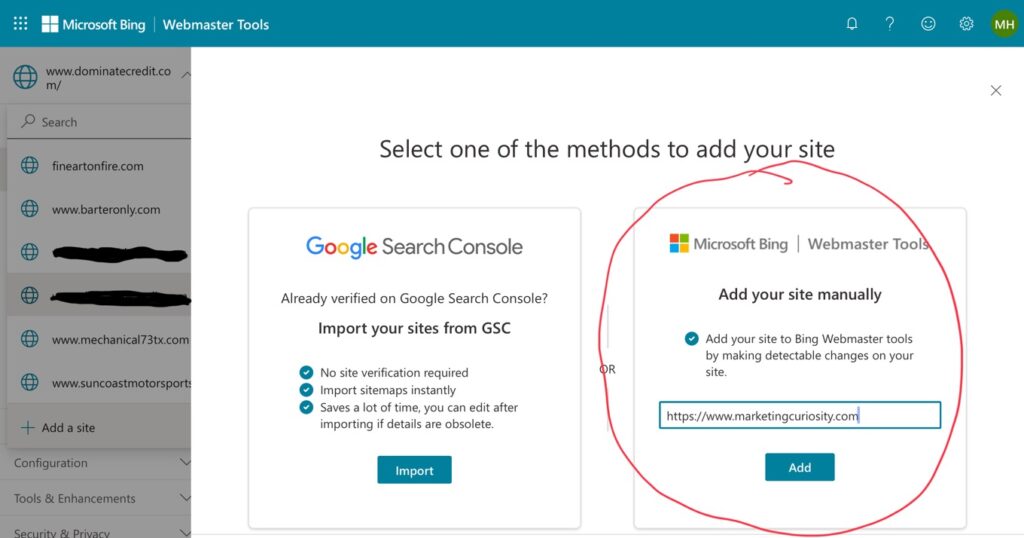
and sign in with your Microsoft account. Then add your property (website). If you want, you can try using the left option and import the data from Google Search Console but I found that it doesn’t work right. Plus, I like just having more control and keeping them separate. So I always choose the right option and add my site manually. Plus, there are features that Bing provides that (and Google doesn’t) so I want to make sure those are open to me…
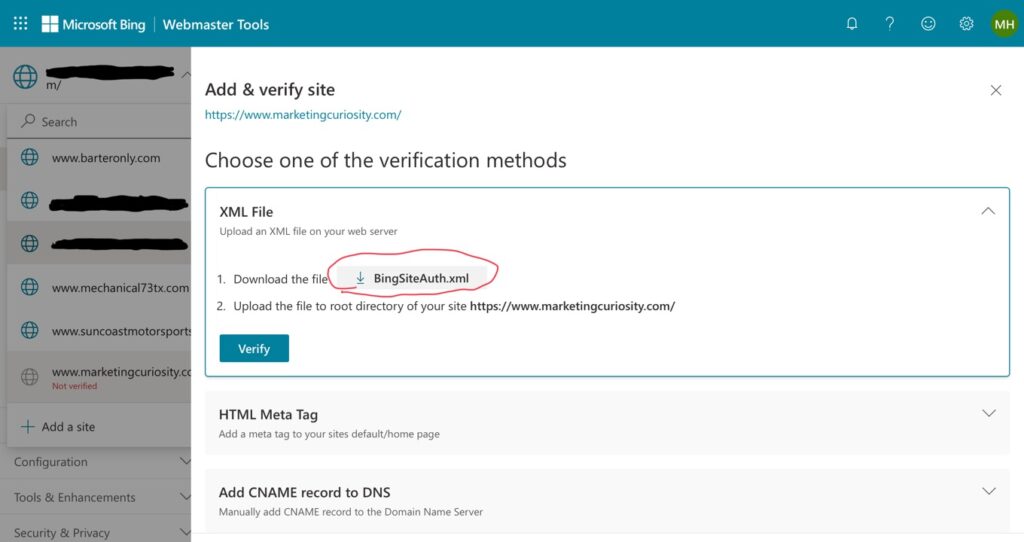
If you go the manual route, the next step is to verify that you own the site. Bing will ask you to download an xml file and then upload it to your site. Or you can verify by HTML Meta Tag- That’s a snippet of code that you can copy and paste to the head section of your website’s homepage. In my lesson on setting up Google Analytics, I showed you how to paste snippets of head code. But for today, I’m going to use the xml download option. It will also be a good opportunity to show you how to upload files to your website.
First, download the “BingSiteAuth.xml” file by clicking on the button…
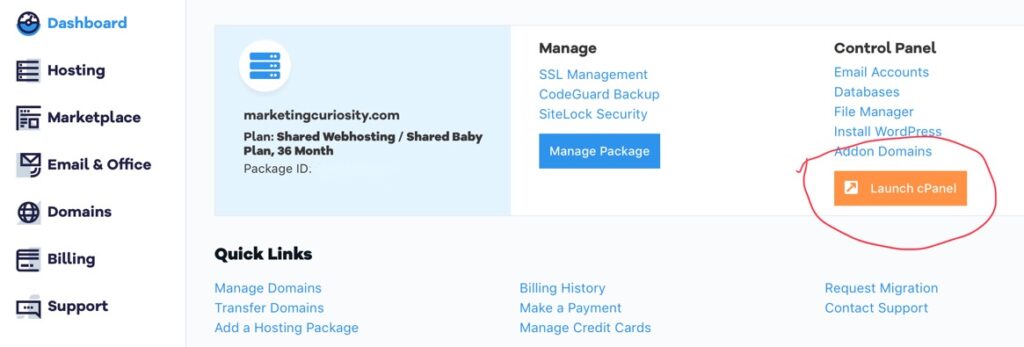
Now, in another tab, log in to NameCheap (if they’re your hosting company) and launch cPanel…
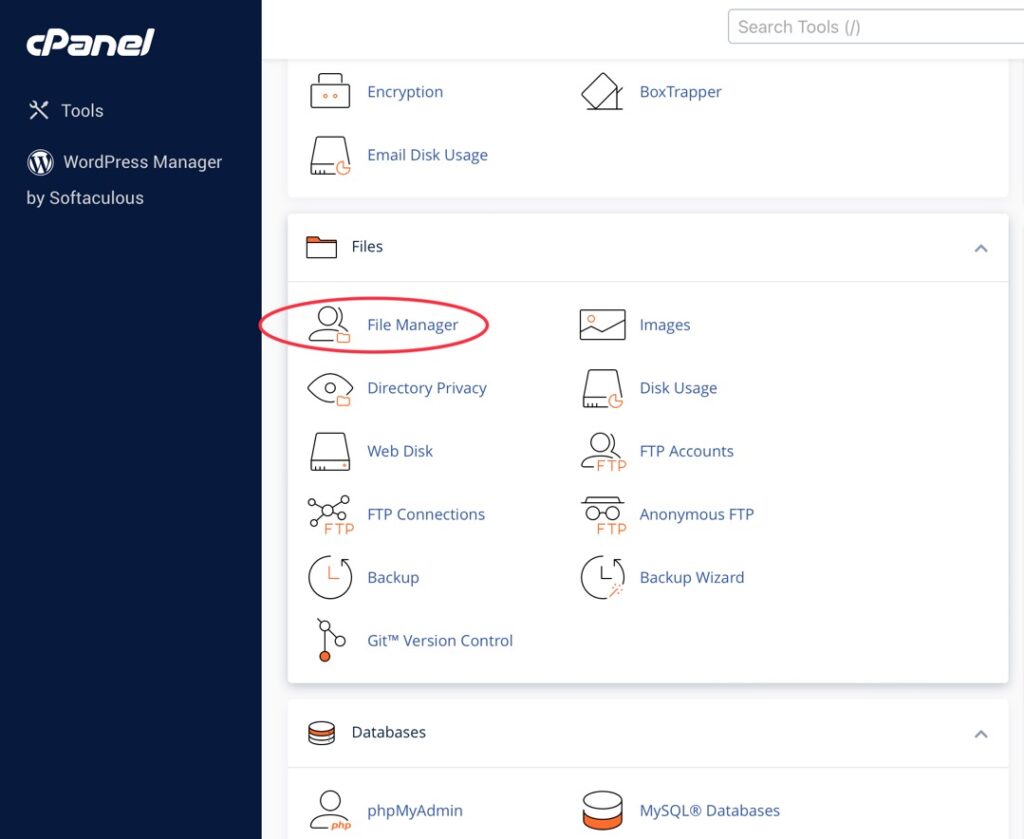
Then, scroll down to the “File Manager” and click on it…
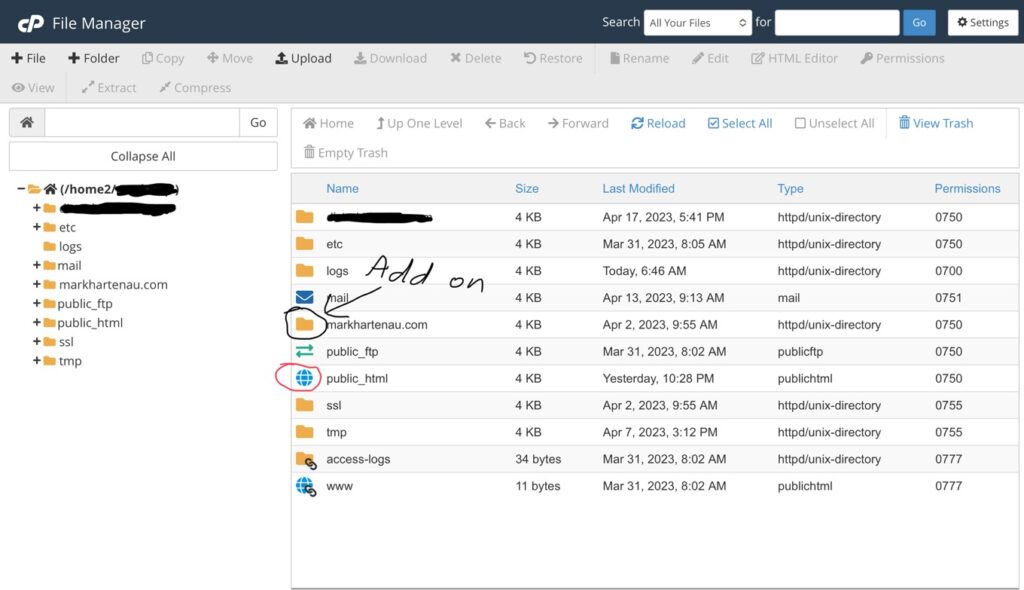
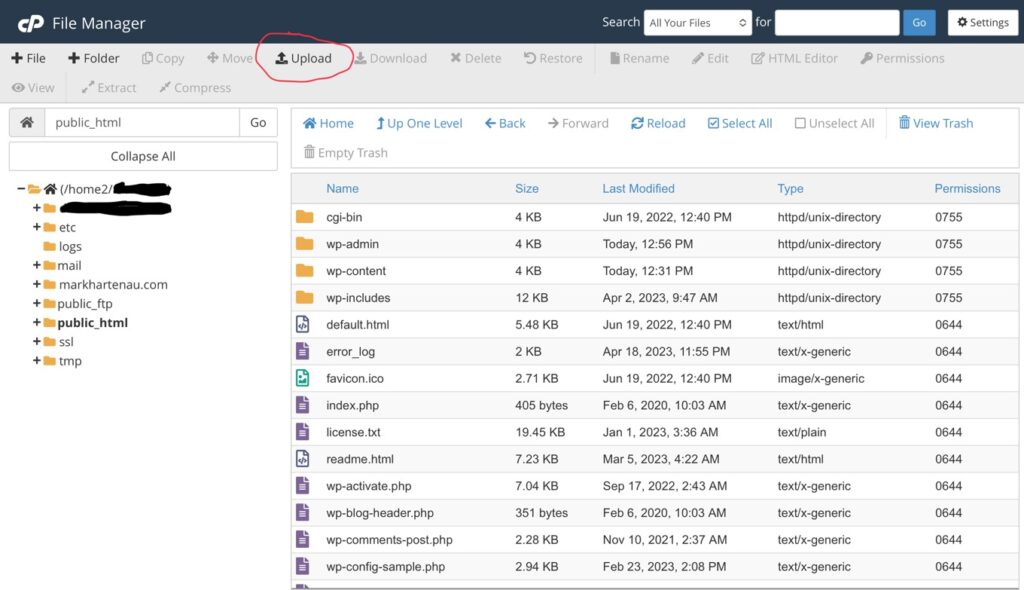
When the file manager opens, double click on the “public_html” icon. If you’re working on an add-on website, then double click on the folder to the website instead. Since I’m not uploading to an add-on site but uploading to the main site, I’m clicking on the “public_html” icon…
When inside the “public_html” directory, upload the BingSiteAuth.xml file by clicking on “Upload” at the top…
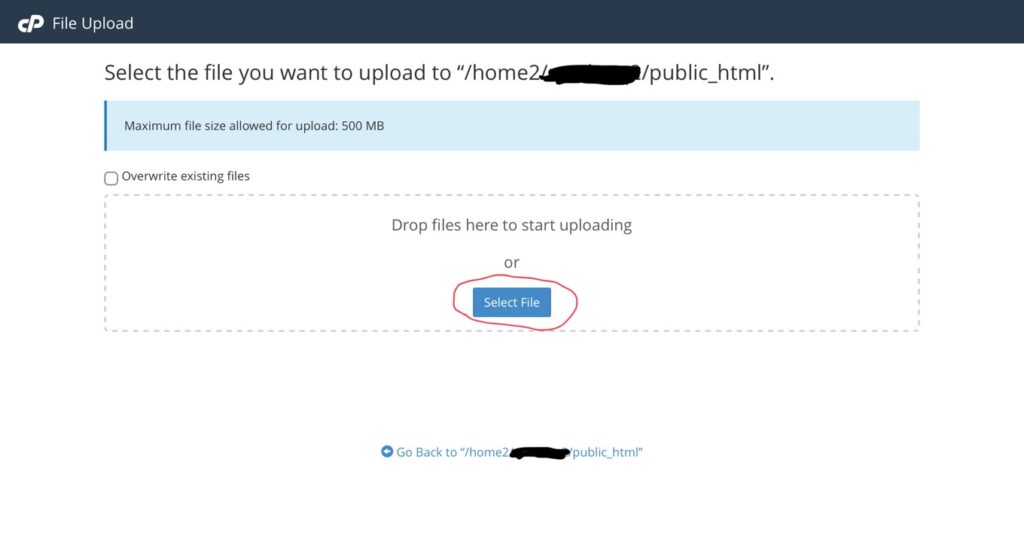
Next, click the “Select File” button to select the BingSiteAuth.xml file from your computer…
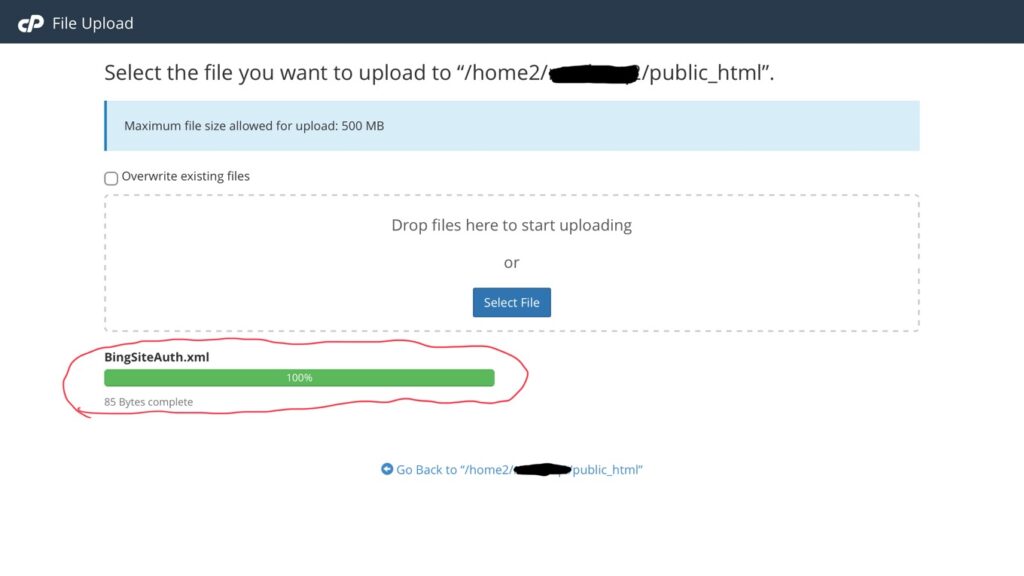
The green upload bar should fill up to 100% and the file is uploaded…
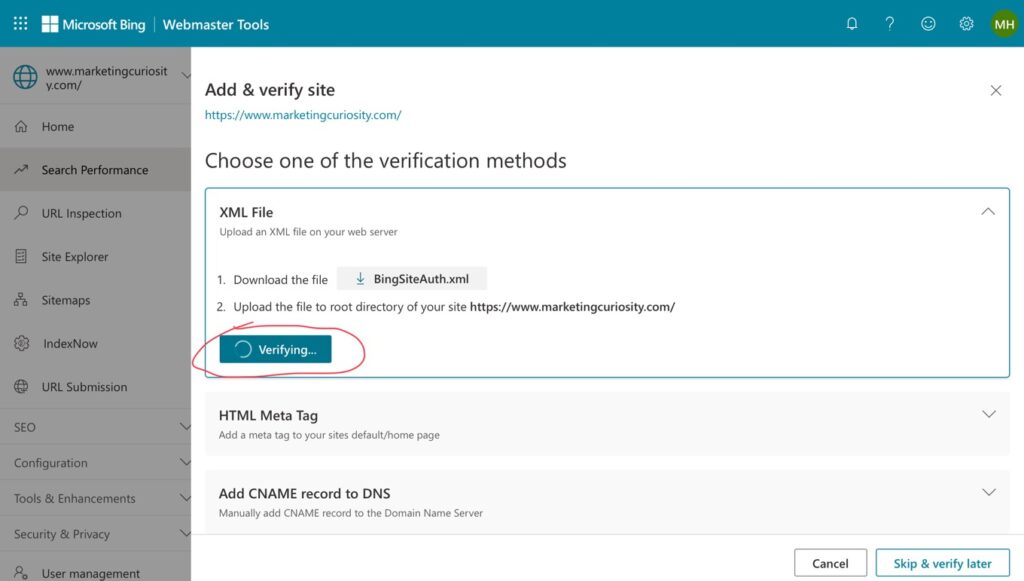
Now, go back to Bing Webmaster Tools (in the other tab) and click on “Verify”…
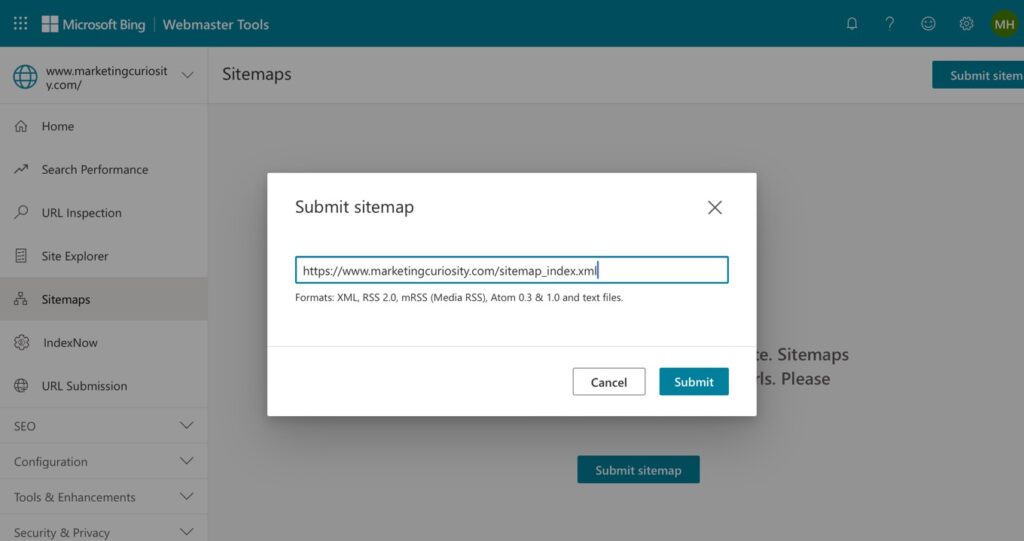
Next, just like with Google Search Console, it’s time to add the sitemap. Click on “Sitemaps” on the left column, then click on “Submit sitemap”…

On Bing, it differs a little in that you have to type (or paste) the entire URL of your sitemap…
That’s it. You’ve now notified Bing that your site exists and you can always come back to Webmaster Tools and check your search activity. You can also speed up indexing and ranking by pasting all the URLs of your website in the “URL Submission” section on the left column.
Next, we’ll learn about how links pointed at your site affect your ranking in search engines. It is something very important that you’ll need to know all about…